3D Heron Cove Shadow Box - Tutorial

Project Description
This tutorial is for the 4 layer shadow box designed by 3Dcuts.com. The process is similar for many of the 4 layer shadow boxes I have designed but I built Heron Cove as I photographed this tutorial.
This shadow box is about 6 1/4" Square when complete. It comes with an optional hanger if you want to hang it on the wall. It is about 7/8" thick and can also stand on a shelf.
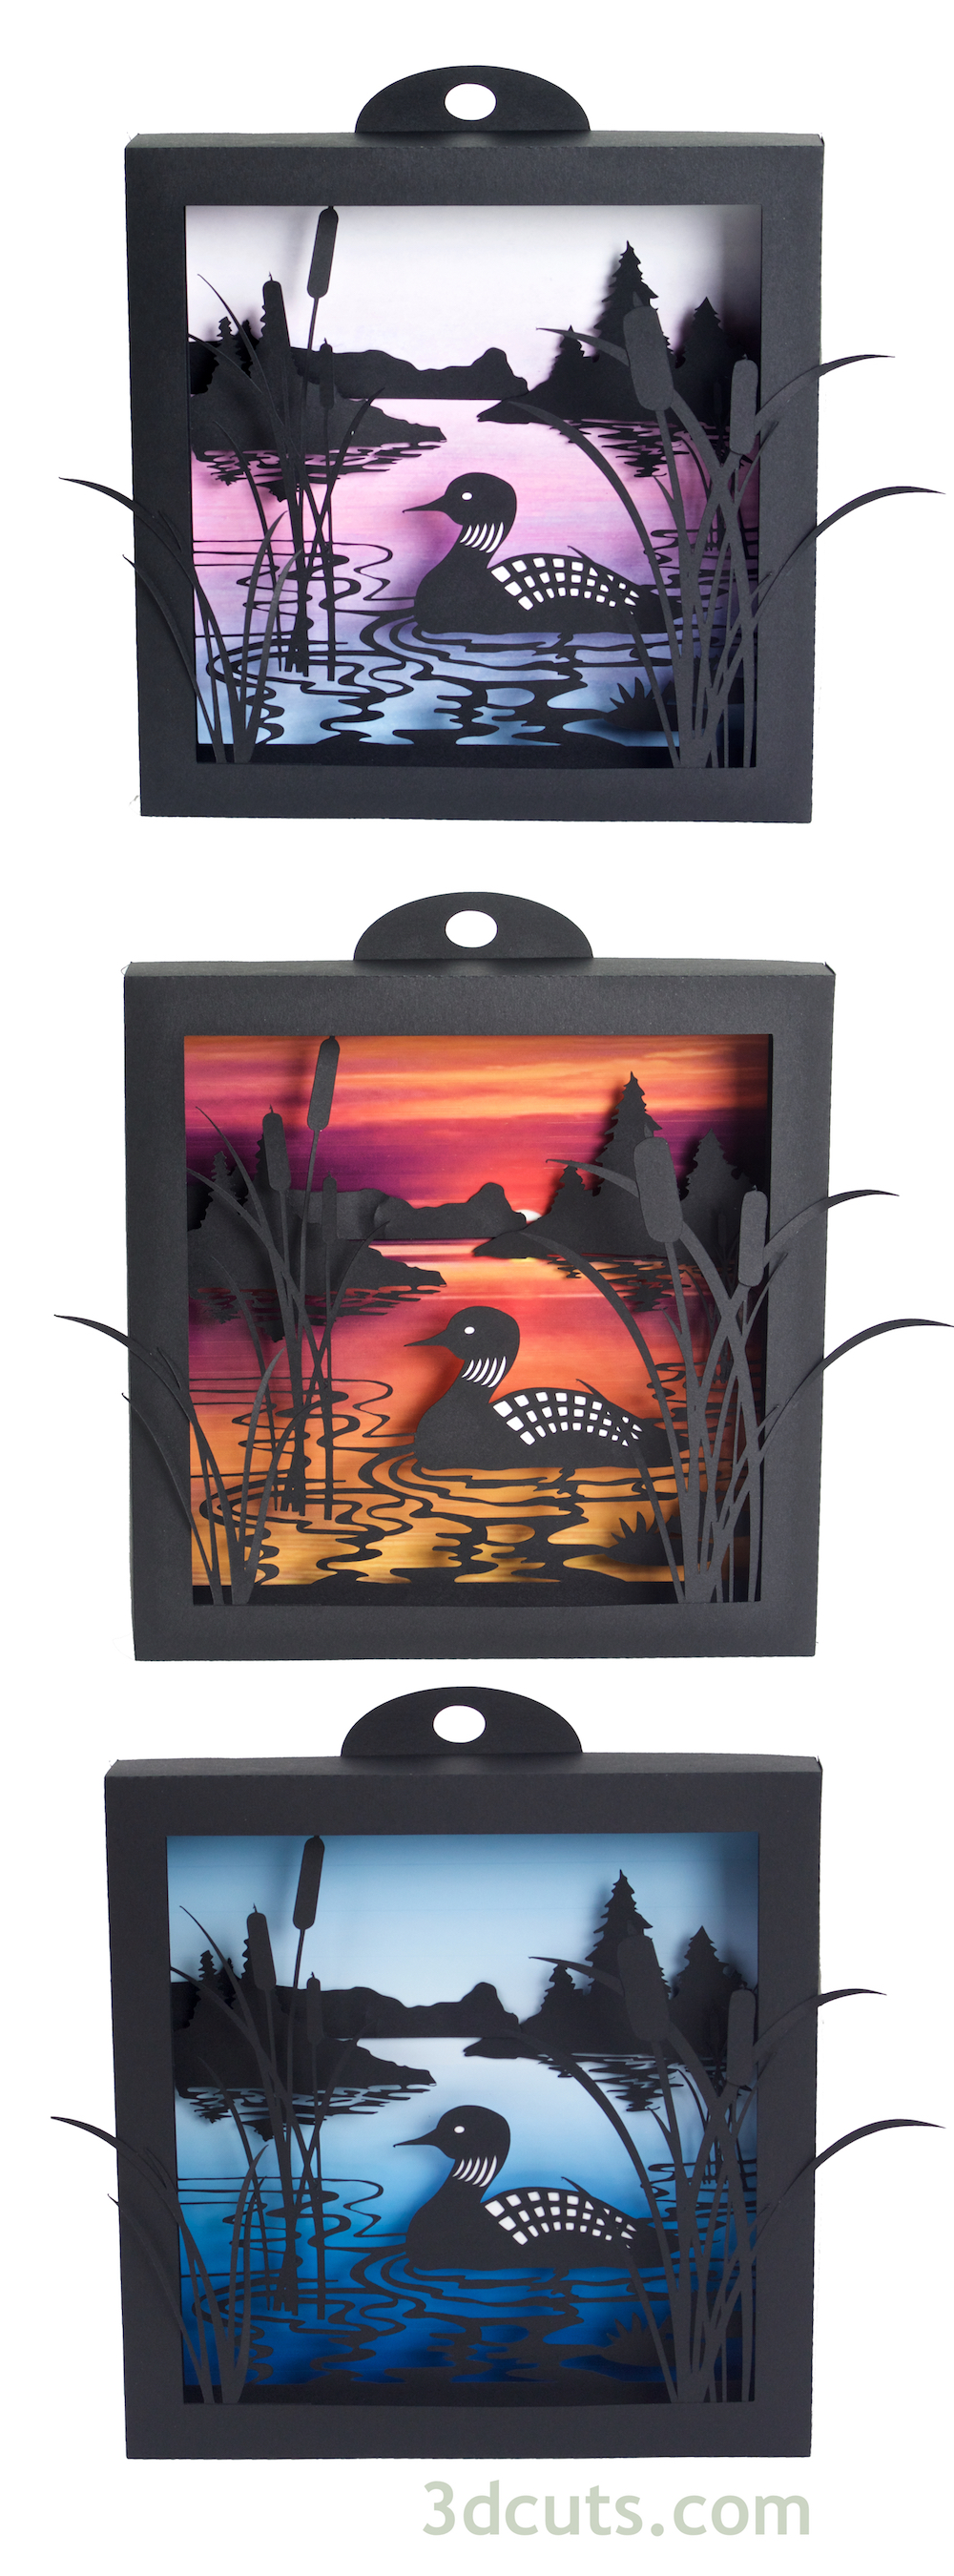
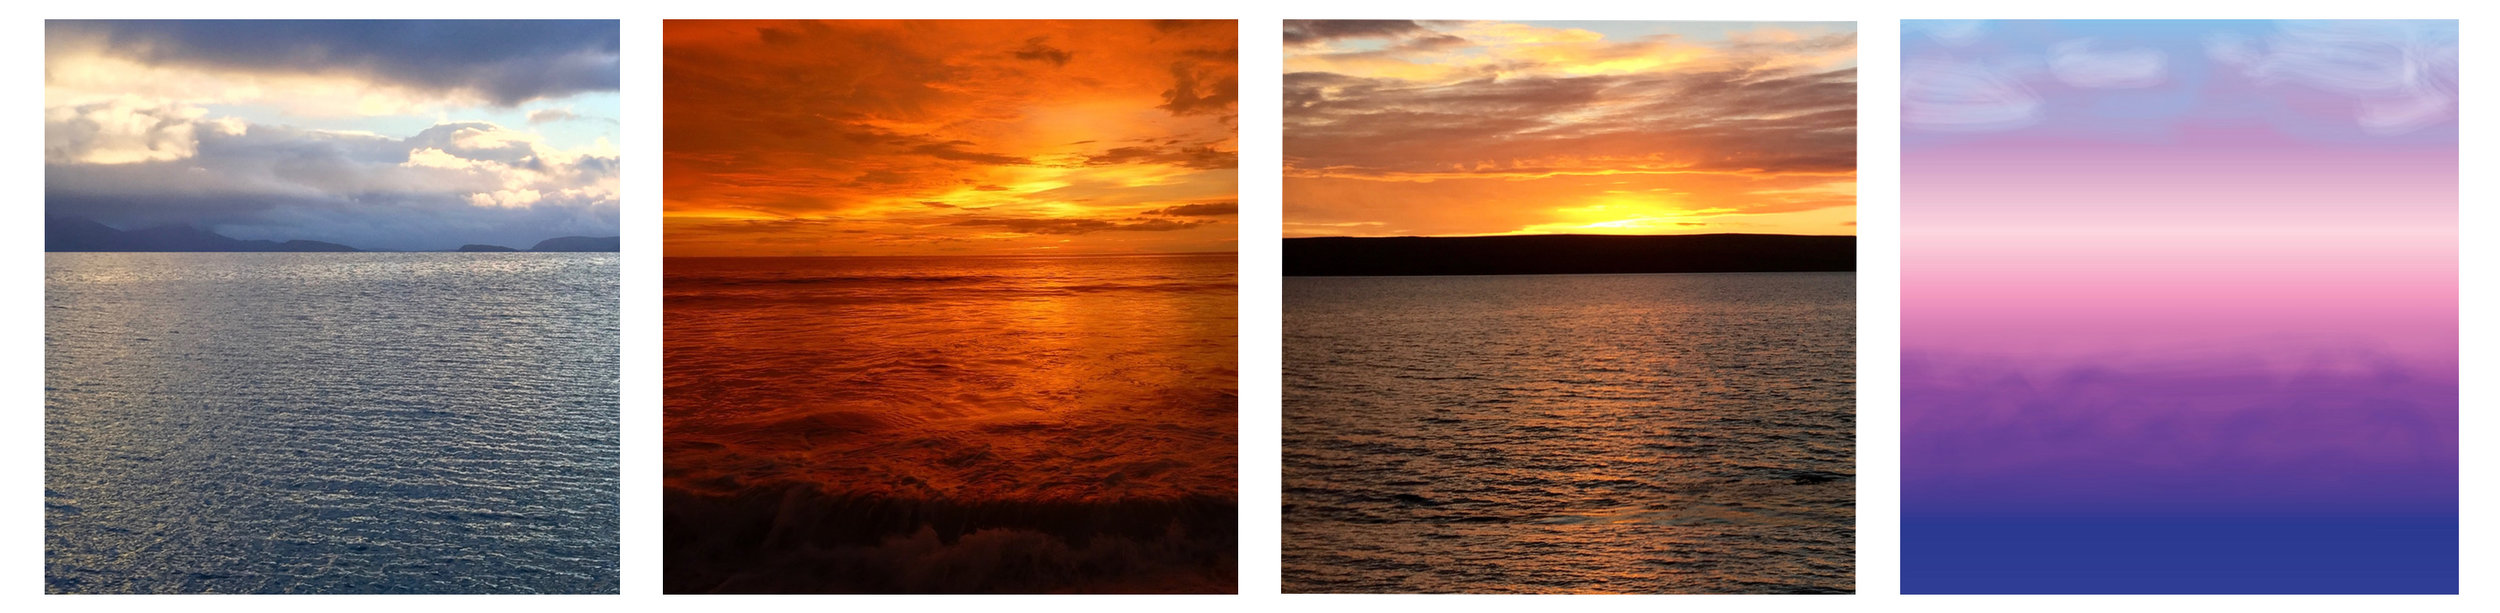
The impact can be dramatically changed by using different background papers.
The assembly is easy and basic 3d construction. The cutting of the file is more advanced and requires some skill.
Supplies Needed:

- Cutting File available here from 3dcuts.com.
- 8.5 x 11" card stock - I used the 65lb Cardstock from Recollections. Each shadow box takes 4 sheets of black plus 1 sheet for the sky.
- Adhesive - I use Scor-Tape, Aileen's Tacky Glue, and glue dots although other adhesives would work.
- Scotch tape
Parts Sizes:
- Frame 1 - 8.27" w x 8.27" h
- Hanger - 6.26" w x 1.3775" h
- Frame 2 - 7.3063" w x 7.3063" h
- Frame 3 - 6.697" w x 6.697" h
- Frame 4 - 8.202" w x 8.202" h
- Large branch - 5.9998" w x 3.4909" h
- Small branch - 3.9029" w x 3.0492" h

Steps for completing the shadow box:
1. Download the cutting files for your cutting machine from the 3dcuts.com store.
2. Load the files into your cutting software following the steps for your cutting machine.
3. Prepare the files:.
- For the Silhouette: The SVG files from this site will need to be turned into cutting files. Click here for detailed steps on how to use SVG files on your Silhouette. http://www.3dcuts.com/tutorial-upload-svg-silhouette
- For Cricut Explore: Here is a guide for importing into Cricut Design Space. http://www.3dcuts.com/tutorial-adding-3dcuts-files-to-cricut
4. Cut the files.

- It depends on the specific file you are cutting but most will have 4 box layers, 1 back ground piece and an optional hanger. Some designs might have accessories that get added as embellishments.
- Several of these cutting files have very fine lines. When cutting fine lines I find it best to have a good blade, and a good mat. I switched to the Silhouette Premium blade and had no trouble cutting the fine lines of this design. I also save mats at the perfect stickiness for fine cutting. A slightly seasoned mat will be too sticky and an over-used mat isn't sticky enough.
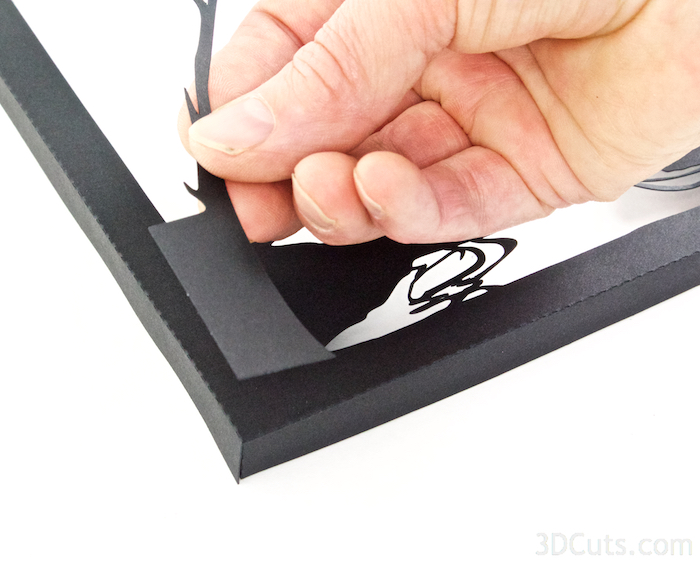
- Also when removing the frames from the mat, always turn it paper side down and curl the mat off the paper. Use a spatula to carefully separate the two. Fine lines can tear if you remove it with out care.

5. Construct all 4 box frames.
- Notice there is a cut-out number in the upper left corner of each frame. Use this as a guide. It will help in identifying the layers, identifying front or back, and knowing which corner should be in the upper left.
- I universally design these so that the number is always in the upper left. On some frames it doesn't matter but on others it does. If you always have the number in the upper left as you work you will know you are assembling things correctly.
- The frames are numbered as they will be when complete. Number 1 is the front frame, then 2,and 3 and 4 in the back. You will not assemble them in that order though.
- Start with frame 1.
- Place the 1 in the upper left corner and fold on all dotted fold lines. You will fold the 1 edges AWAY from you on frame 1.
- Make nice, crisp folds.
- Frame 1 is the outside frame and these corners are visible when the project is complete. I use 2 strips of Scor-tape in each corner and then fold the tab to the inside and adhere.


- Frame 1 is complete. Place that to the side and work on Frame 2.
- Fold all edges along the dotted fold lines toward the back on frame 2.
- This frame is an internal frame and it gets held together with the other frames. I just used 1 glue dot in each corner to adhere the corners.
Add embellishments to frame 2.
- The larger of the two tree branches gets attached to the front of frame 2.
- Add three 1/4" foam dots to the back side of the thick part of the tree base.
- Adhere it to the lower left corner of frame 2 on the front side. The edges of the tree base will line up with the edges of the frame.
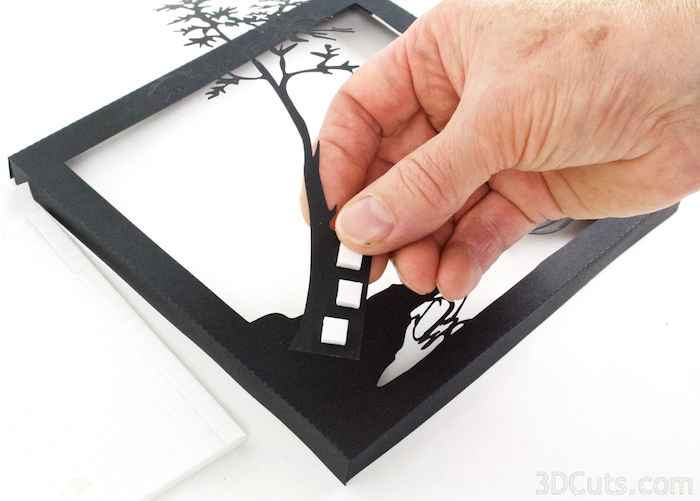
- The tree branch will rest upon the top of the frame.
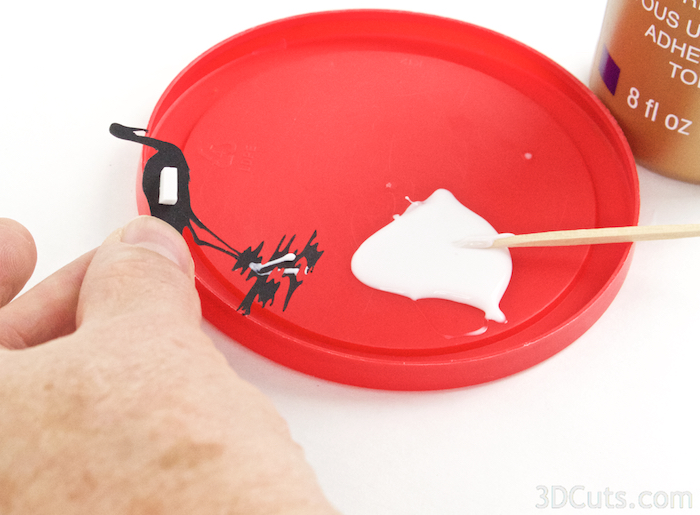
- Place a small dot of a quick drying paper glue (I used Aileen's Tacky glue) behind the leaves that do touch the frame.
- Allow to dry.
- This adds much needed support to the tree.

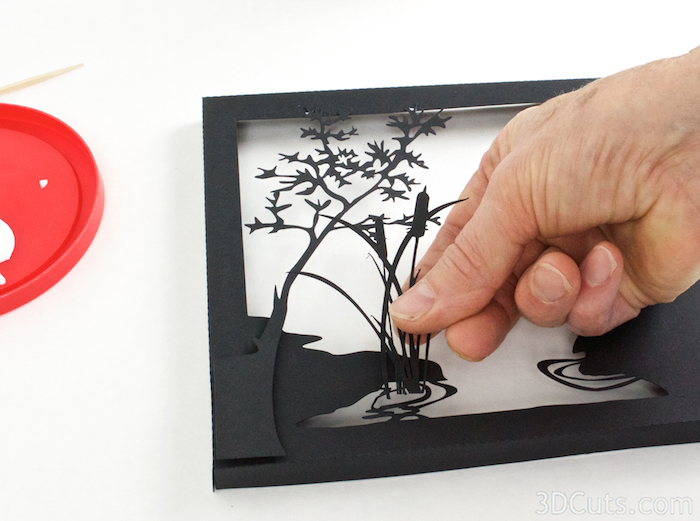
- There are two cattail bunches. The larger one gets glued into location on the left. Apply a little tacky glue to the back of the rushes about 3/8" above their bottom edge.
- Place the rushes into the water circle and on top of the land form. Glue the rushes to the front of the land form.
- The smaller batch of cattails get glued to the back of the land form on the right. Apply glue to front of the rushes and adhere to the back positioning them to sprout above the out cropping.
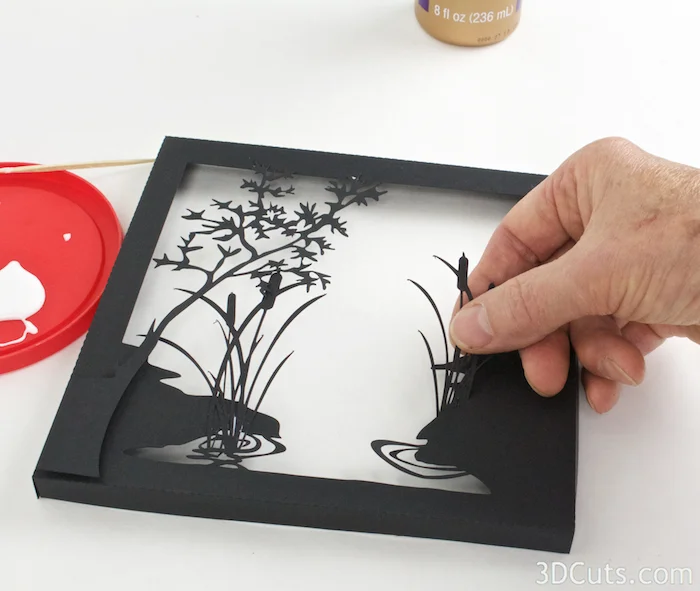
- Add 3 glue foam dots to the corners of the right land piece.
- Attach it to the front of frame 2 in the lower right corner.
- Tutorial note: This piece was added in later versions of the design. Not all photos include it. It is an optional piece that I like.


- Frame 2 is now complete. Place that to the side and move onto frame 3.

- Fold all the edges toward the BACK on Frame 3 and use glue dots to secure the corners.
- There are no embellishments to add to Frame 3.
- Construct Frame 4.
- Frame 4 has all edges folded toward you.
- Use adhesive to glue the corners keeping them nice and square.

6. Combine the frames.
- Frame 2 gets placed over frame 3 with their back edges lining up.

- Use scotch tape to attach frame 2 and frame 3 together. This keeps the spacing of the layers in place.
- Flip them over. aligned the back edges of one side and apply a piece of scotch tape to the center.
- Fold it over the edge adhere the back edges together being careful to keep back edges aligned.
- Cut off any extra tape.
- Repeat this on all four sides.


- Time to choose a background for your shadow box. Included with your 3dcuts download are 4 photo backgrounds. You can choose any of these or make your own. Print the background using a color printer. I used photo paper to get the brilliant colors.
- If you downloaded this file from the Silhouette online store, it came with no backgrounds and you need to either create your own or you can purchase just the backgrounds here for 99¢. You can print a copyright free photo from the internet or create one using water color washes. Even a simple gradated piece of paper will look stunning.
- Ideally the horizon line should be about 2 3/4" down from the top edge.
- Choose your background and cut it to 6.25" square (6 1/4").
- The extra piece of land gets adhered directly to the background paper.
- Measure down 2 7/8" from the top. The straight bottom of the black piece lines up at that point.
- I used glue dots to adhere it.


- Adhere the background to the inside of frame 4. I used a tape runner but other adhesives will work.
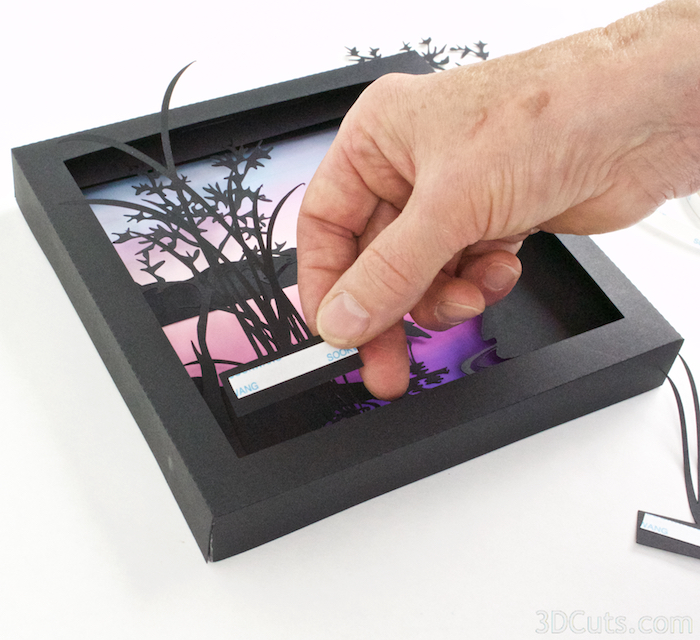
- Place a strip of Scor-tape about 3" long on all 4 sides of Frame 2.
- This should be placed near the front edge and in the center as shown.
- Leaving the backing in place.
- Do this on all 4 sides.

- Slide frames 2 and 3 into frame 4.
- Slide it all the way to the back.

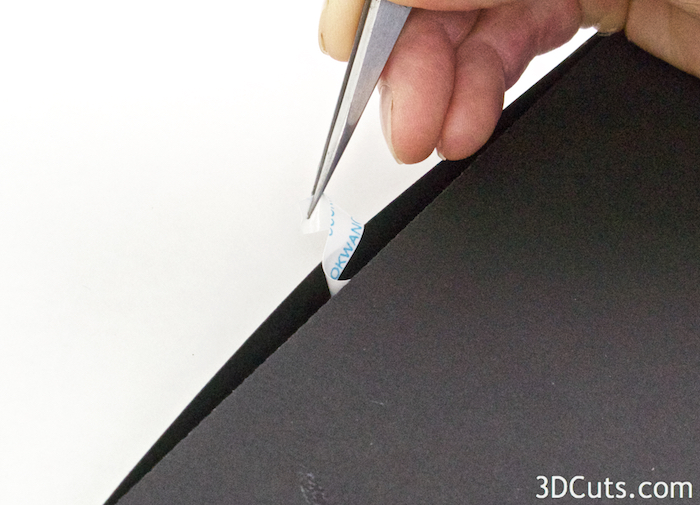
- Using tweezers, reach into the seam and grab the backing off the score-tape.
- Pull it out and adhere the side of frame 2 and 3 to the inside of frame 4.
- Repeat this on all 4 sides.

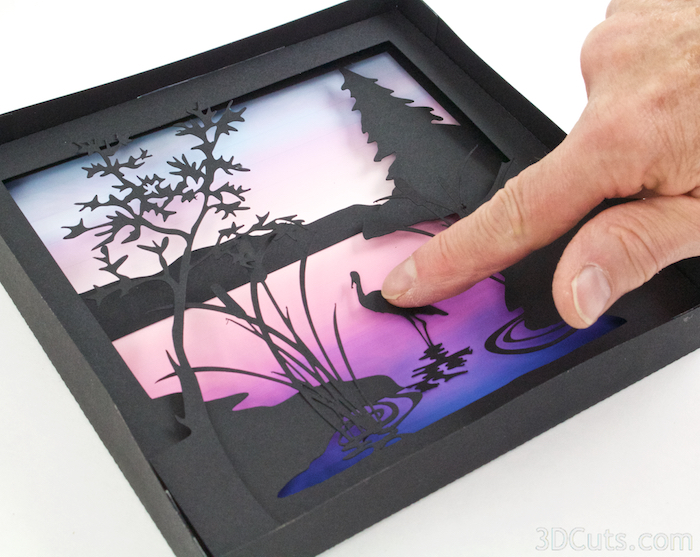
- Apply a small foam dot ( I cut a 1/4" square one in half) to the back of the heron body. Place it so it won't be visible when complete.
- Add a touch of tacky glue to the ripples near the heron's feet.
- Carefully position the heron on the background. The body will be in front of the background because of the dimensional dot. The ripples should be glued to the background.
- Press in place.
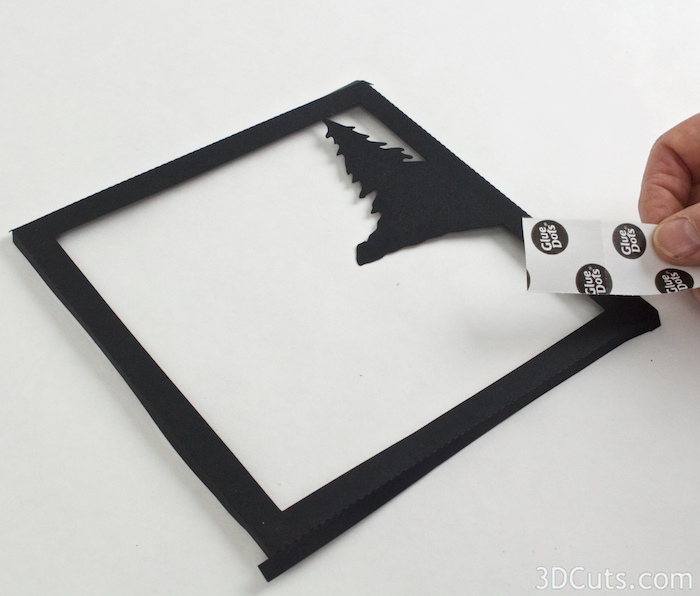
- The optional hanger gets adhered to the inside upper edge of frame 1 before you attach frame 1 to frame 2-4.
- Apply Scor-Tape on the inside edge of the hanger.
- Fold the hanger tab on the dotted score line.
- Place the hanger inside of the top edge of frame 1 and press in place. Be sure to center it.


- Adhere Frame 1 to the combined frames 2-4.
- First apply a 3" strip of Score-Tape to the outside of each side of frame 4 leaving the tape backing in place.
- Place on the back edge and near the center as shown in view 1.
- Do this on all 4 sides.
- Place frame 1 over frame 4.
- Use tweezers to reach into each side seam and remove the backing to the 4 pieces of Scor-tape and press each side in place.


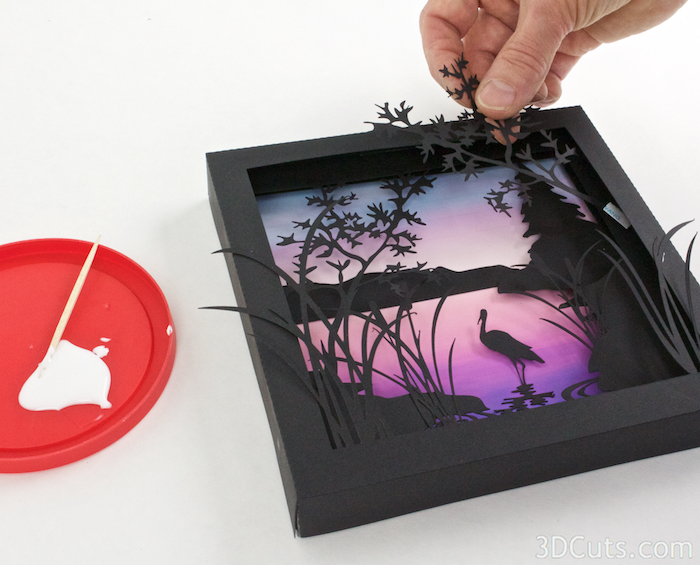
- Add embellishments to the front of the shadow box.
- There are 3 different ones, 2 bunches of reeds and 1 branch.
- The placement of these is not critical and your choice but I put the large reeds in the lower left, the smaller reeds in the lower right and the branch in the upper right.

- Apply Scor-Tape to the front of the tab at the base of the reeds and attach it to the inside of the front frame being sure to hide the tab.
- Add a touch of glue to the reeds as the pass over the frame edge to help support them.
- Repeat with the reeds on the right side.
- Add a bit of Scor-Tape to the end of the branch and adhere that to the inside of the frame.
- Add a touch of glue under the leaves to attach them to the frame.


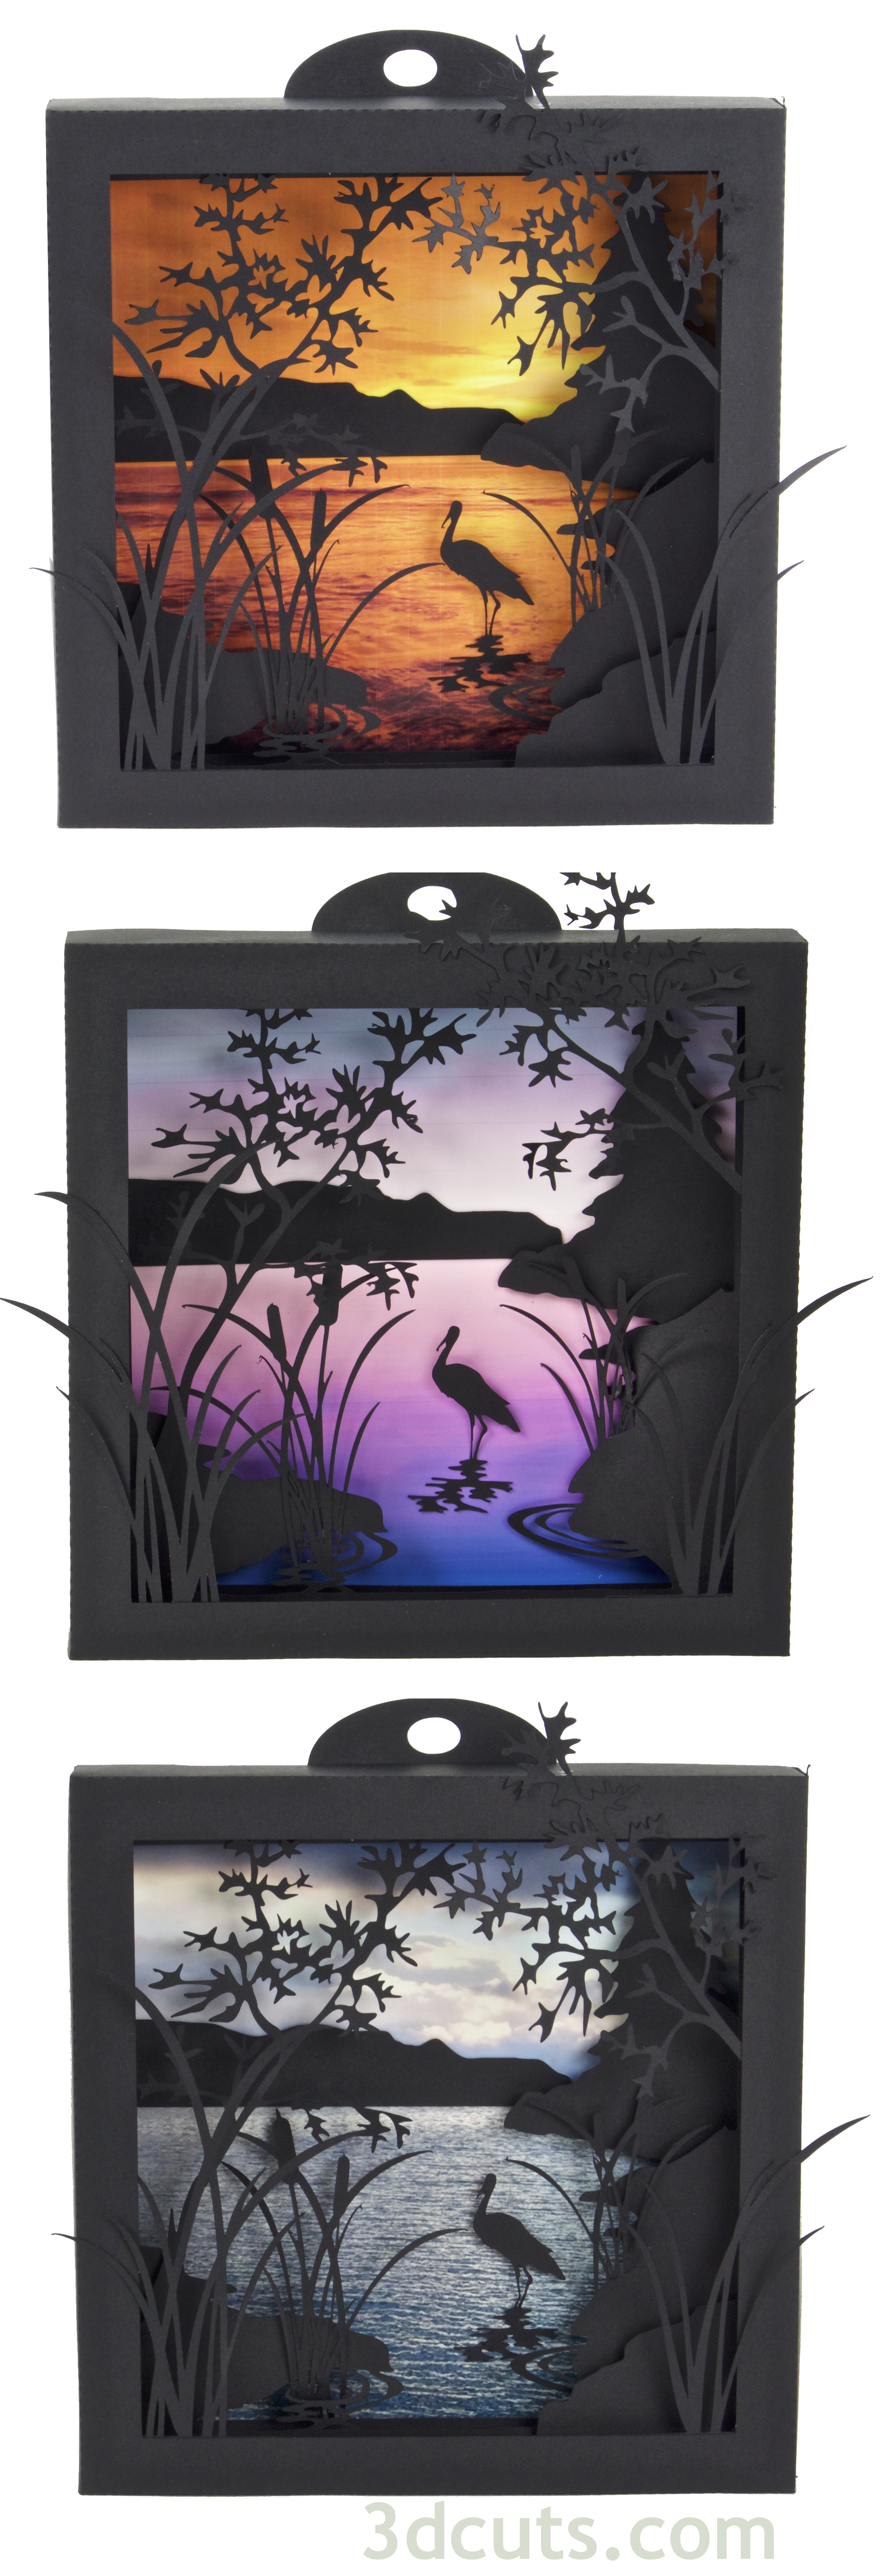
Congratulations! Your Heron Cove Shadow Box is complete. Where will you display it?
And which Nature themed shadow box will you make next?


Here is the Heron Cove Shadow Box made with three of the backgrounds provided with the file download.
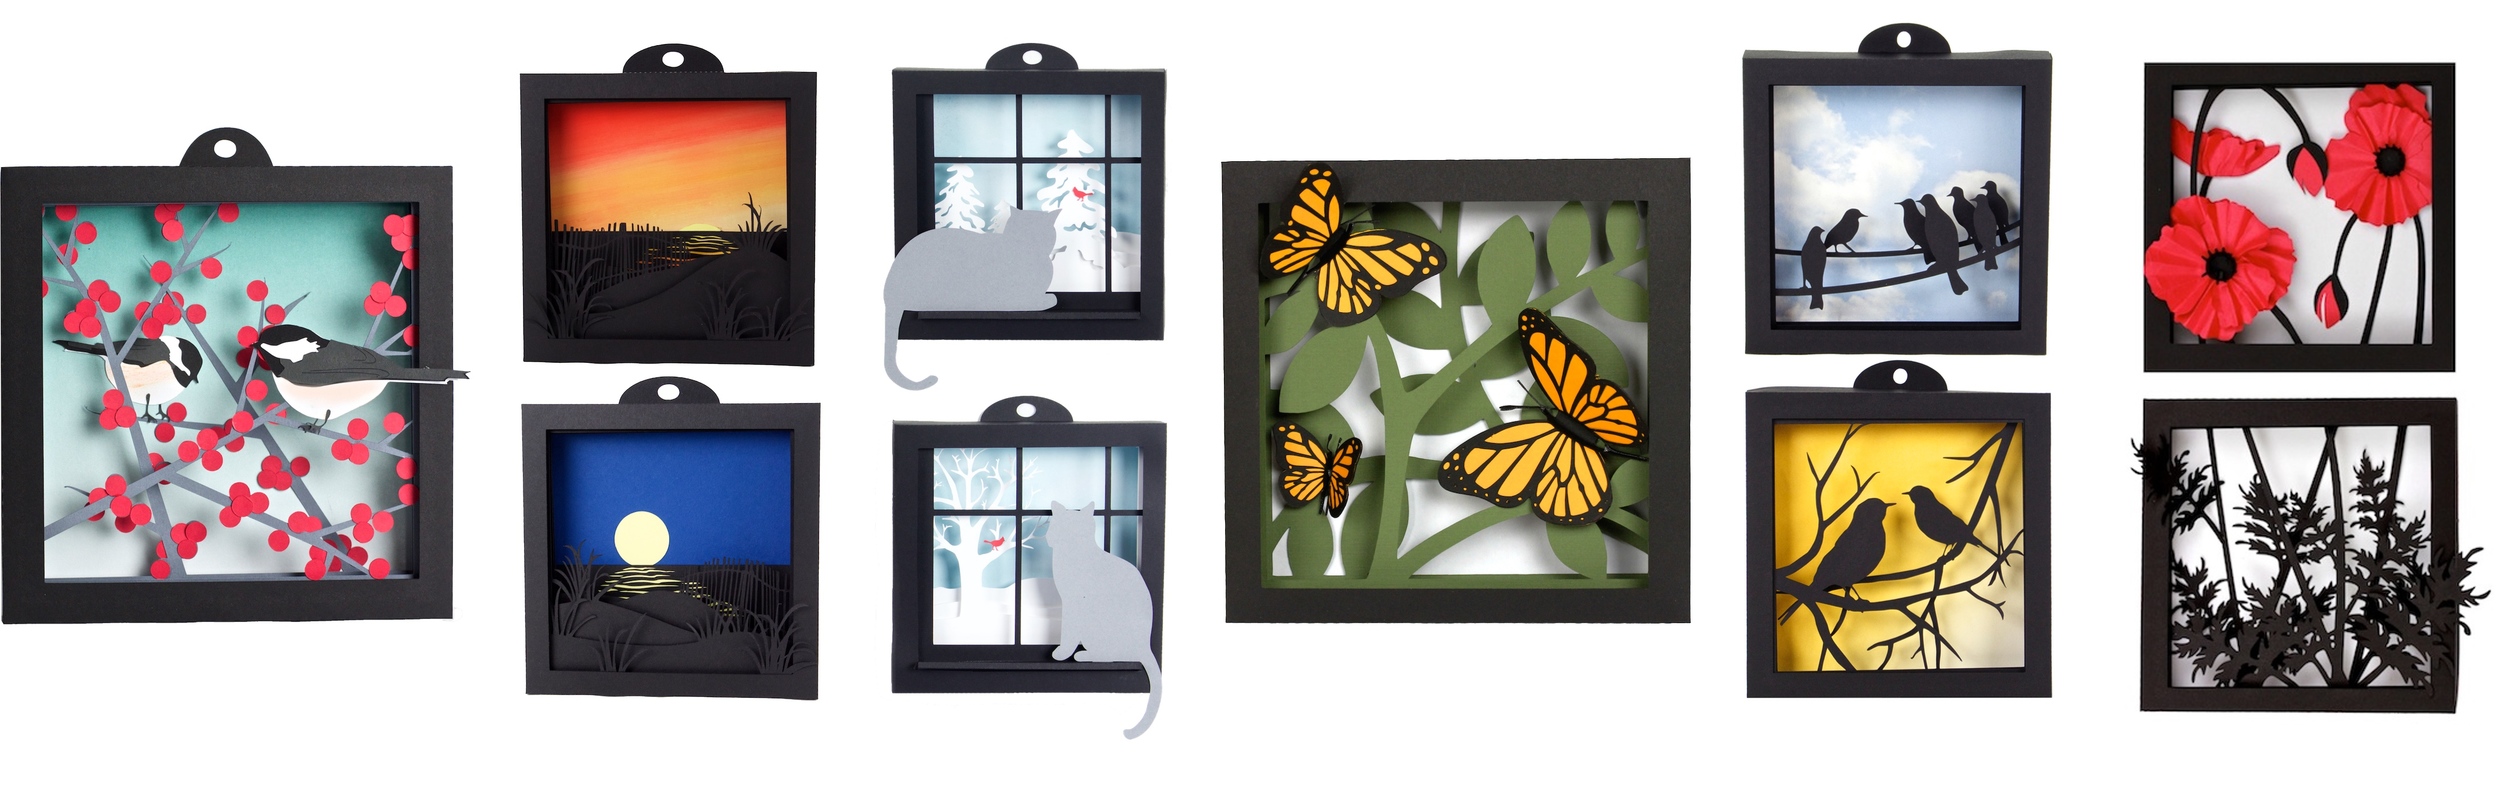
Would you like to make more shadow boxes? I have designed many. Here are a few:
The collection is available at: http://3dcuts.com/shadow-boxes-nature-themes