Note: Ledge Village cutting files are available here on this website and at the Silhouette online store. You can purchase them as grouped files here for a reduced priced.
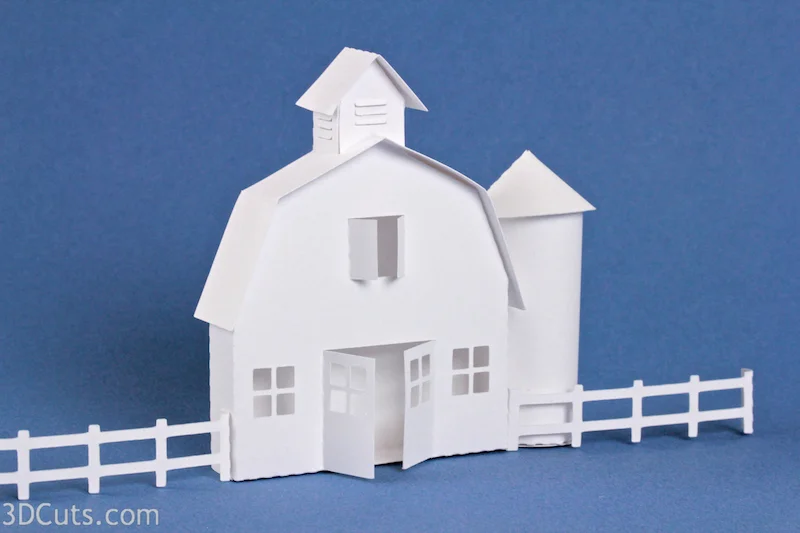
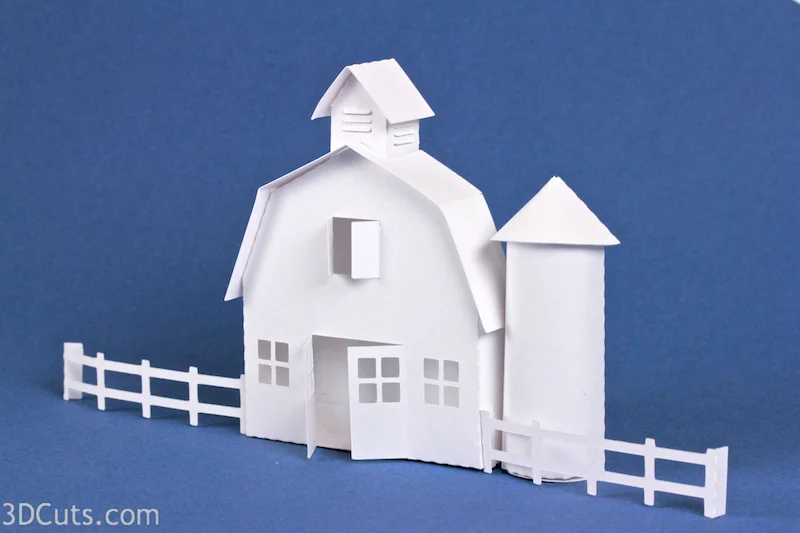
Tutorial - Ledge Village Barn
Project Description:
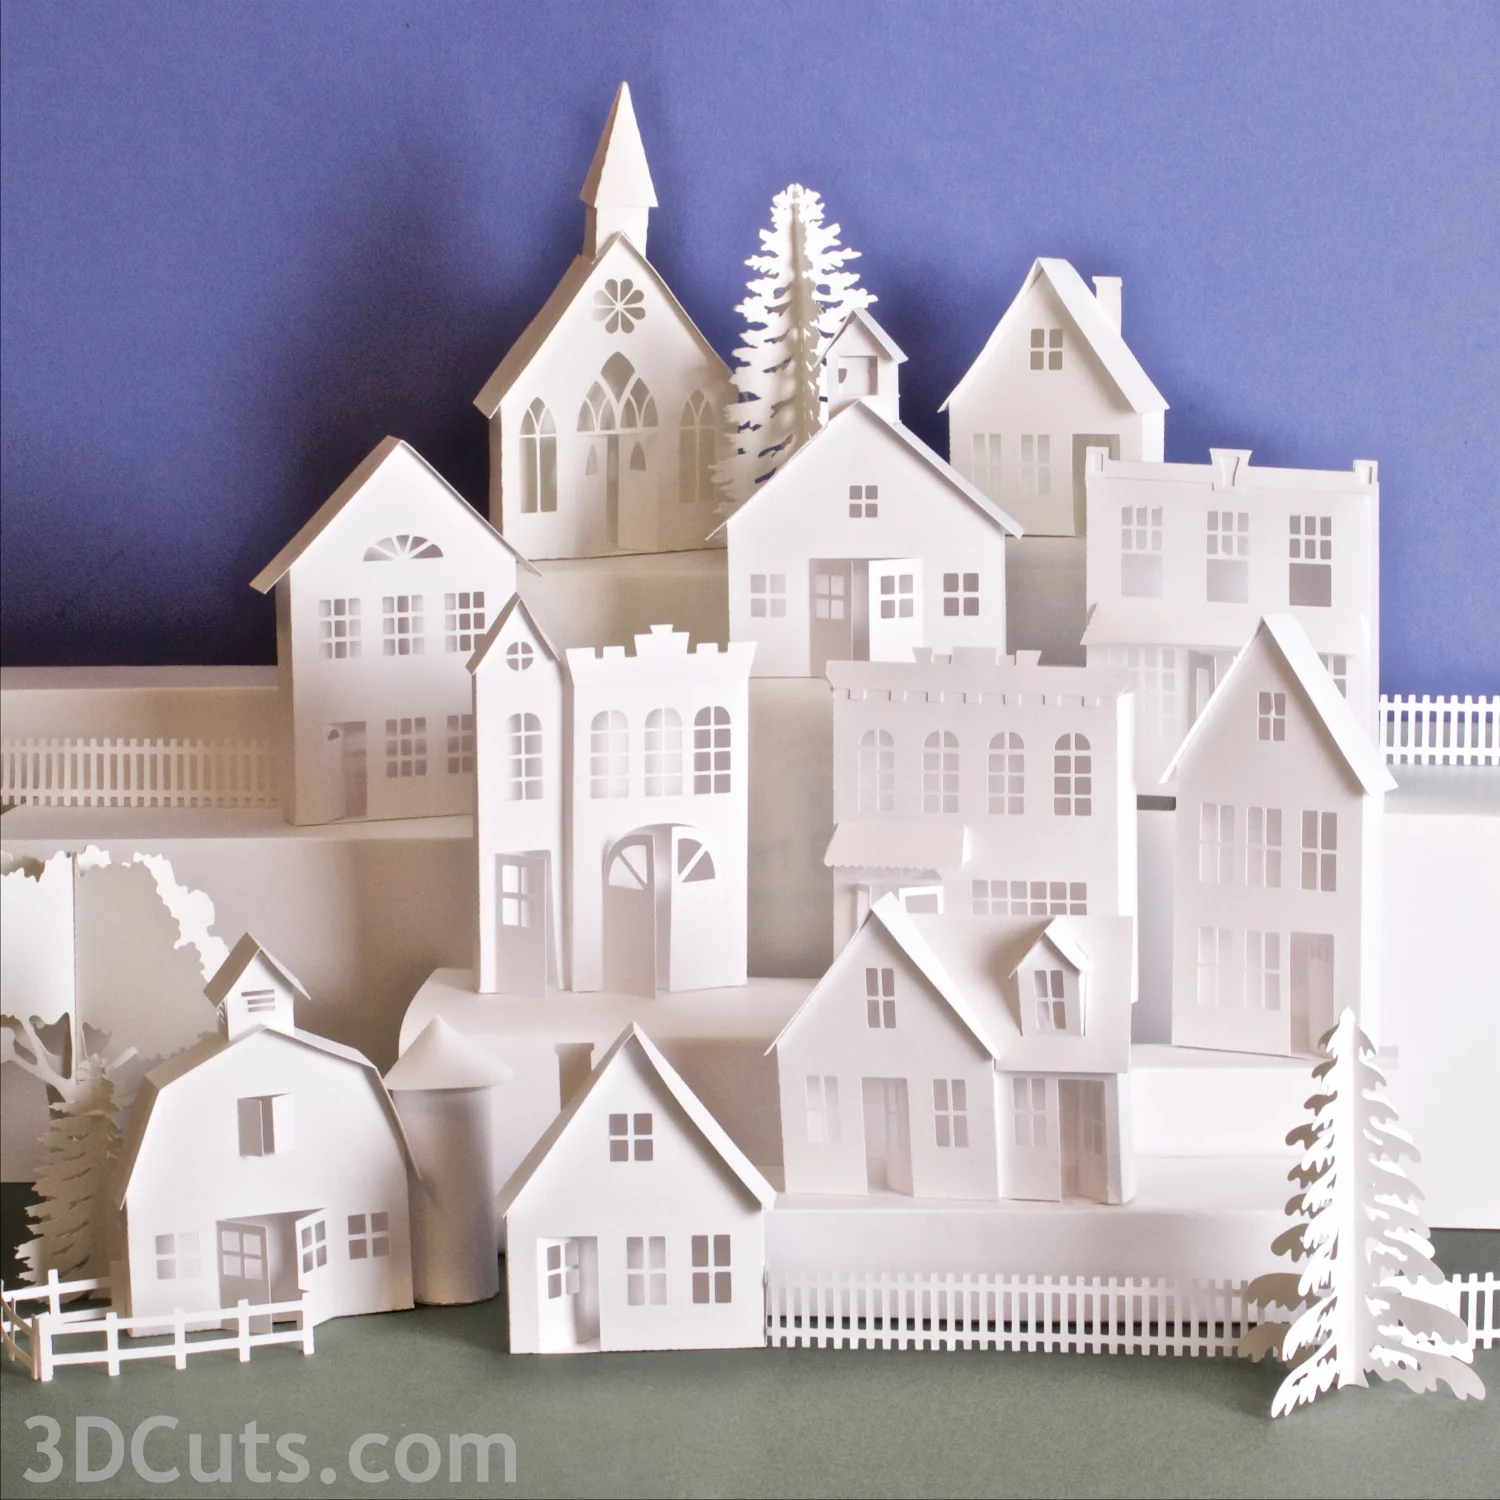
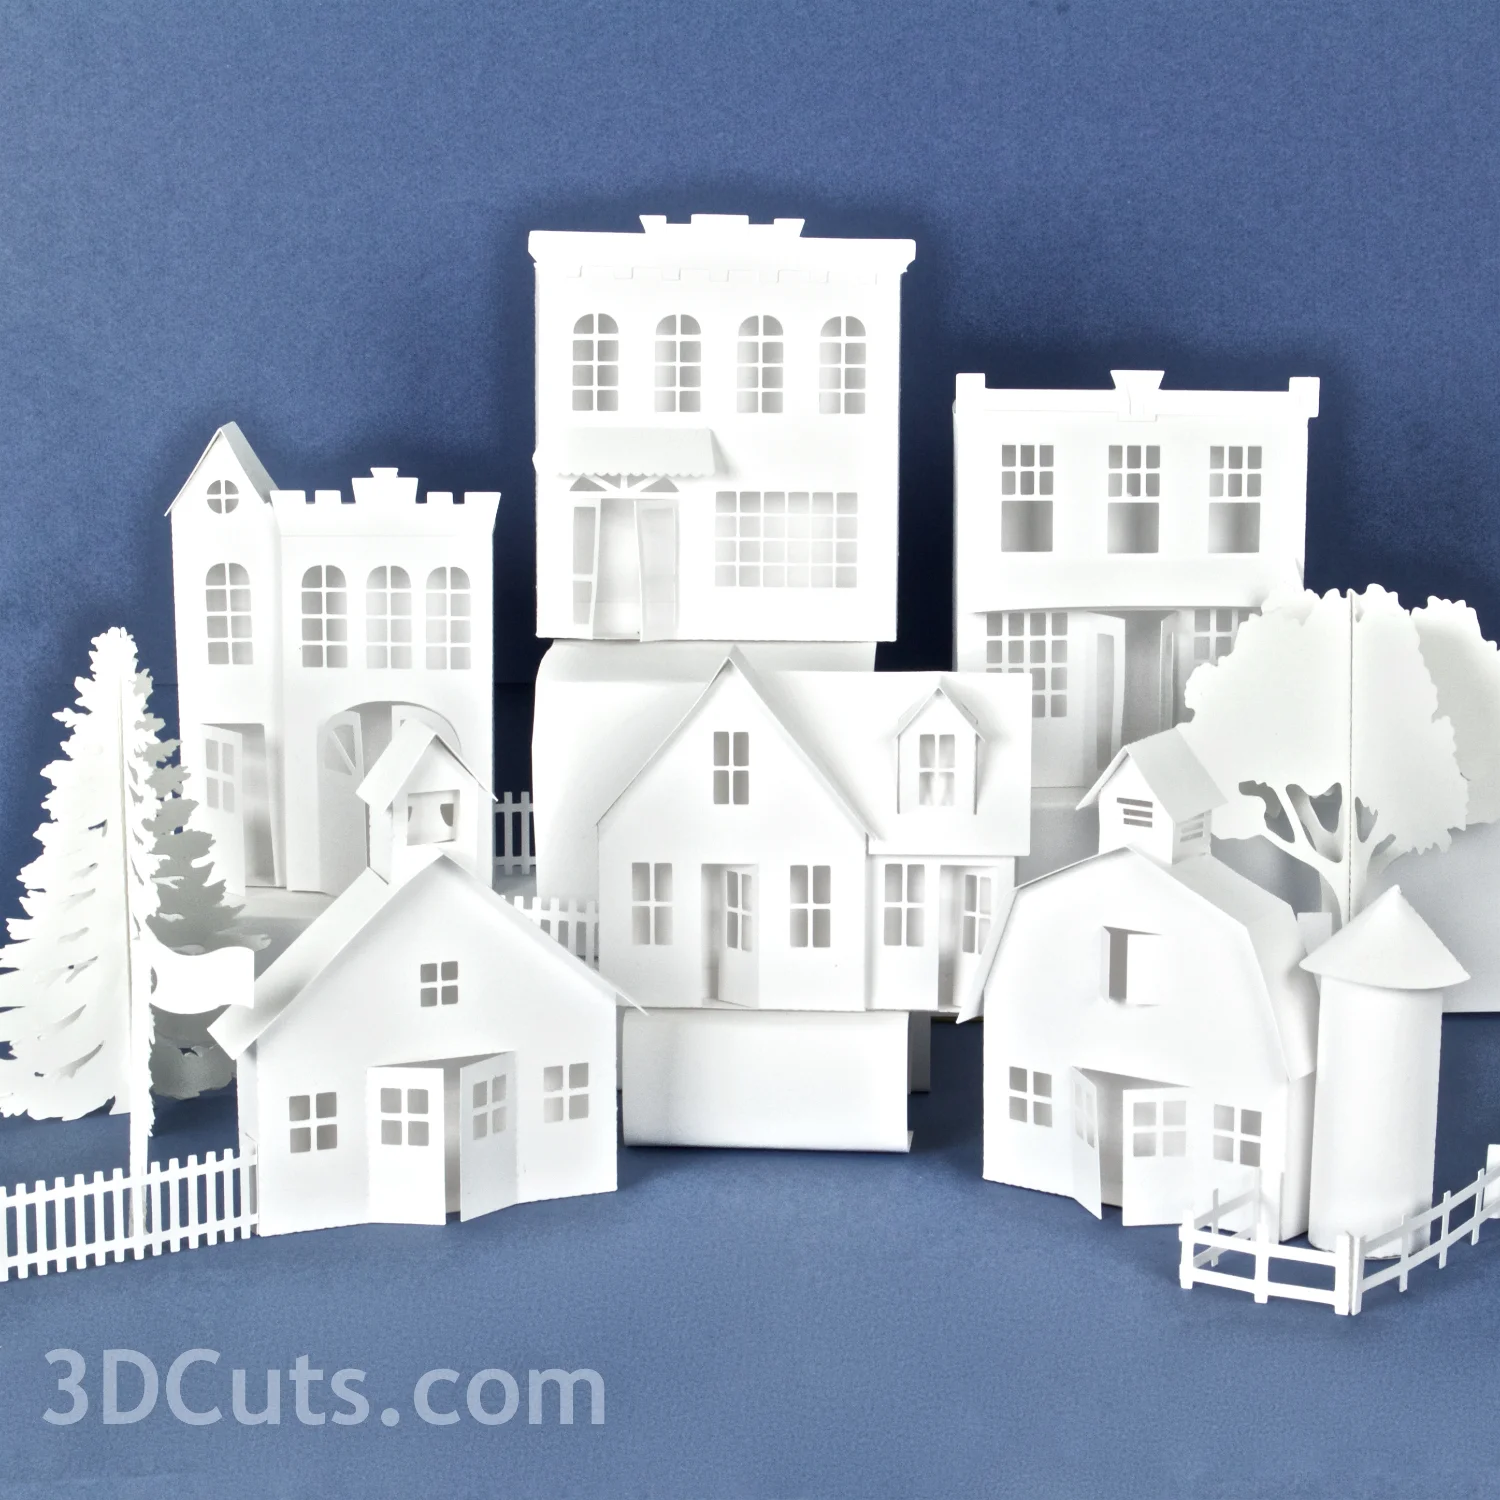
The Ledge Village is series of 3D buildings and accessories that can be combined in a mix and match fashion to build tiny villages on small ledges around your home. The buildings are thin, with all detail on the front so they fit on small trim ledges. A growing number of files for Ledge Village can be found at 3dcut.com
This tutorial is for the Barn.
Supplies Needed:
- Cutting File downloaded on 3DCuts.com here
- Your preferred adhesives
- Glue Dots
- Scor-Tape
- Zig Glue Pen
- Scotch Tape
- Card Stock
File Sizes:
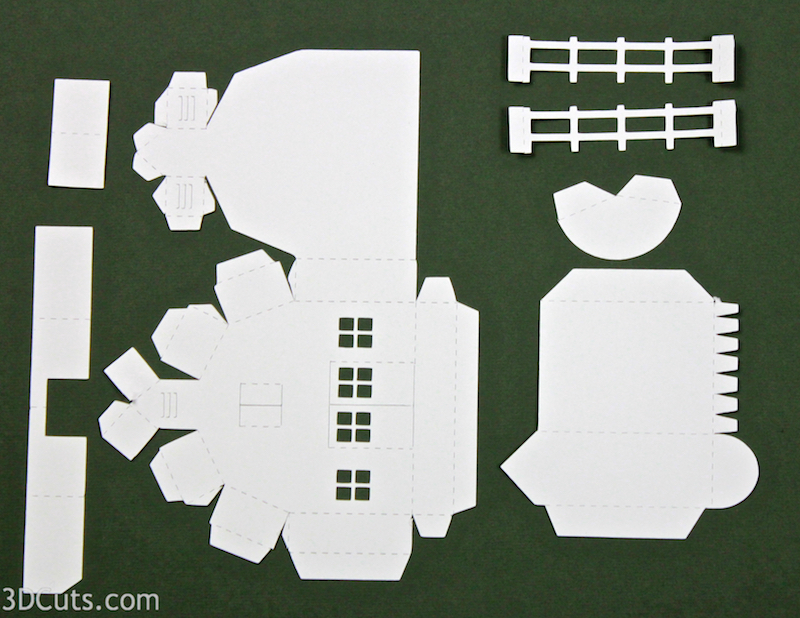
- The barn and all parts come in one file that is 11.4253"w x 10.9935"h.
Steps for completing the 3-D Ledge Village Barn project:
1. Download the cutting files for your cutting machine at 3dcuts.com
2. Load the files into your cutting software following the steps for your cutting machine.
3. Prepare the files:.
- Click here for detailed steps on how to use .SVG files on your Silhouette (with Design Studio).
- Click here for steps on how to use these .SVG files in Design Space with your Cricut Explore.
- Each piece will fit on 8.5 x 11" card stock. You will need to cut and paste the pieces to different pages to cut. I cut the main barn from one piece of card stock and all the others from another.
4. Cut the files:
- Paper colors are your preference. I like the simplicity of the all white but others have used a variety of card stock with great results. The file is grouped together. You can ungroup it in order to cut various parts from different papers.
- The windows and smaller details (like the picket fence) require you to understand how you cutting machine and blade best cut details. I find working with a good blade and mat and my Silhouette cut settings set on Card stock with a blade of 3, a speed of 4 and a thickness of 24 works nicely.
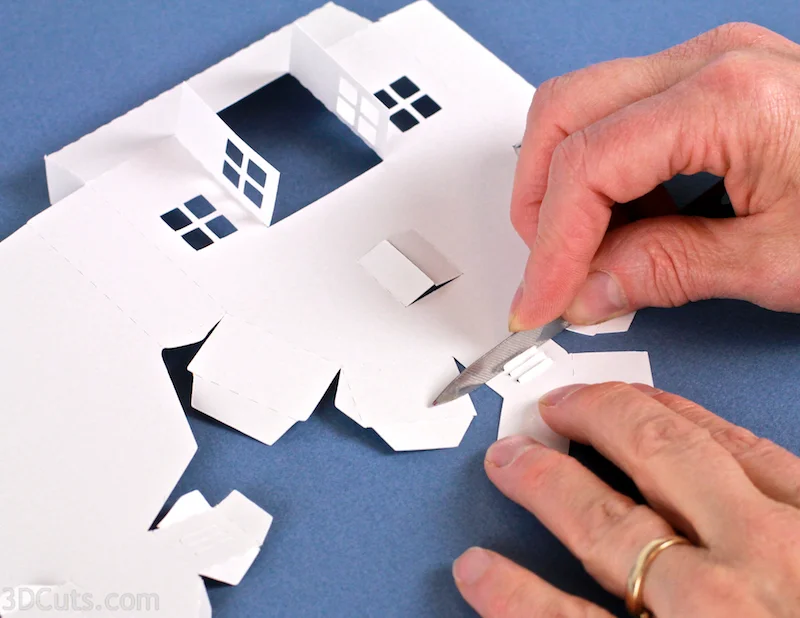
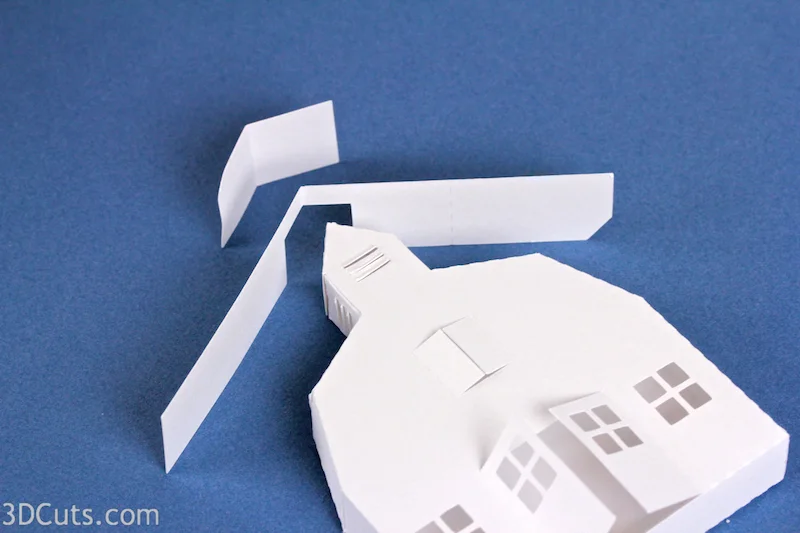
5. Fold on all dotted fold lines.
- Note each cut file has dotted lines. These are fold lines.
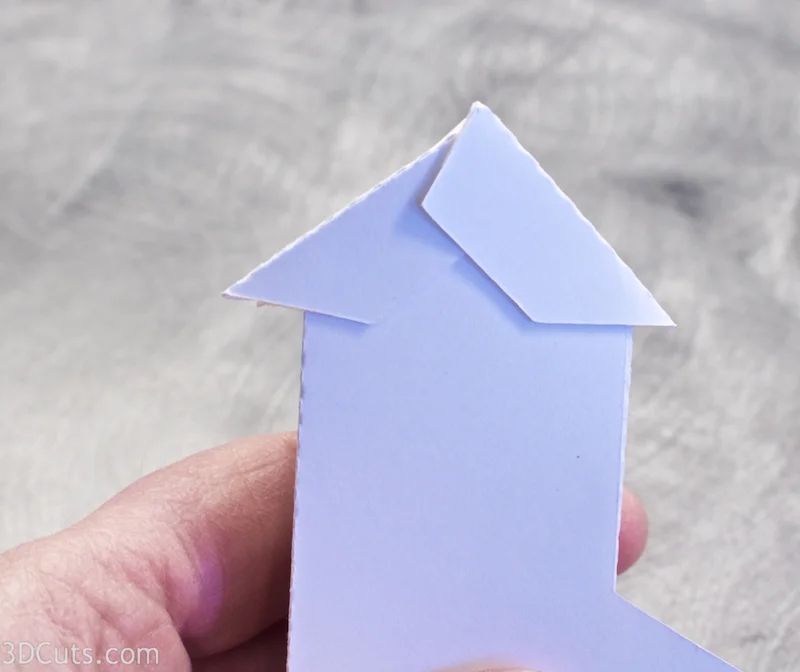
- Fold all the dotted lines inward except the house inset going back to the wing and the flaps on the dormer. Those fold in the opposite direction. Don't worry if you can't identify these places at the start. Just fold all the dotted lines and they will easily fold the other way when needed.
6. Barn Assembly
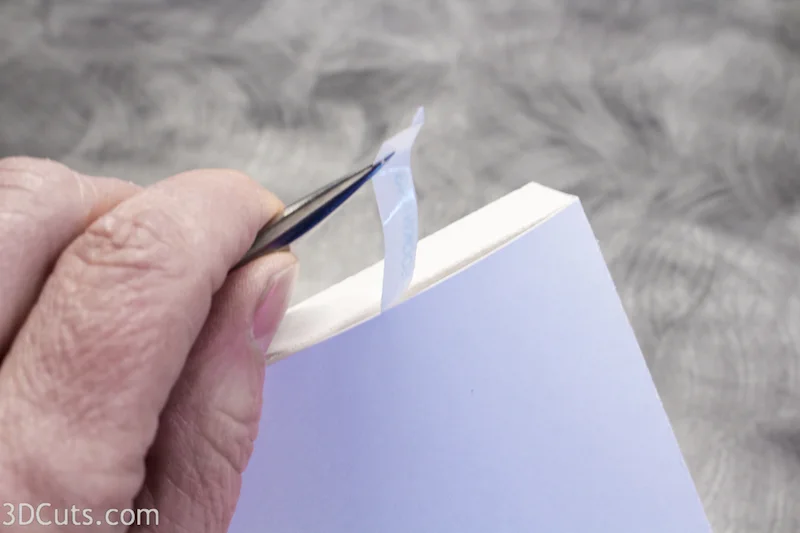
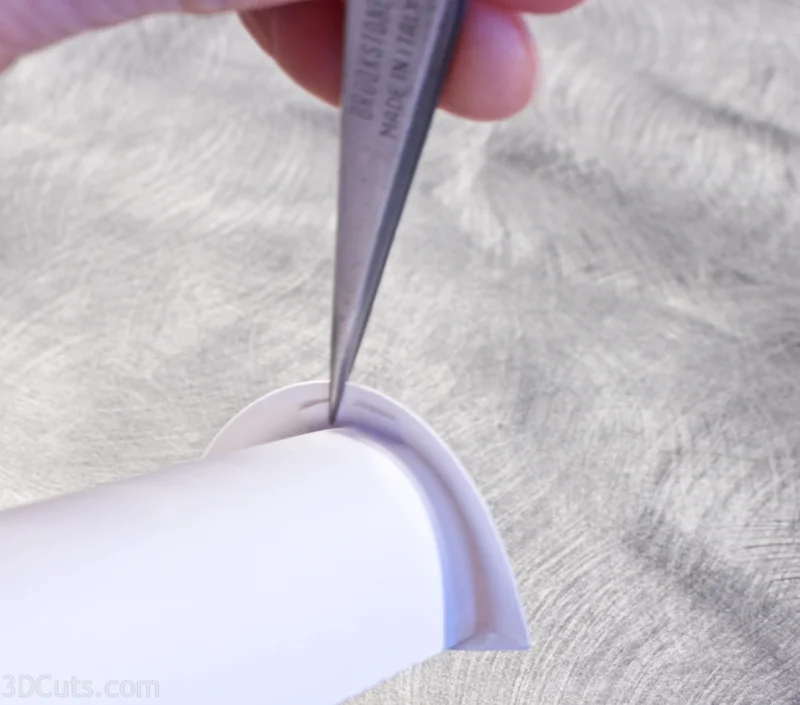
- Some general notes: I have constructed many ledge houses over the years. My adhesive preference is always choices that keep my fingers dry and clean, but I also want permanence. We all have favorite adhesives and many work. For a long time I used glue dots extensively and many of the photos in this tutorial show glue dots. I still use them in selective places but I have combined them with Scor-Tape. I especially like Scor-Tape because I can apply it to the tabs but LEAVE THE BACKING ON until I want to position a tab. I find that I can be more precise in placement using this technique. I use fine point tweezers to peel off the backing. This allows me to reach into a seam and pull the backing off as I press in place.
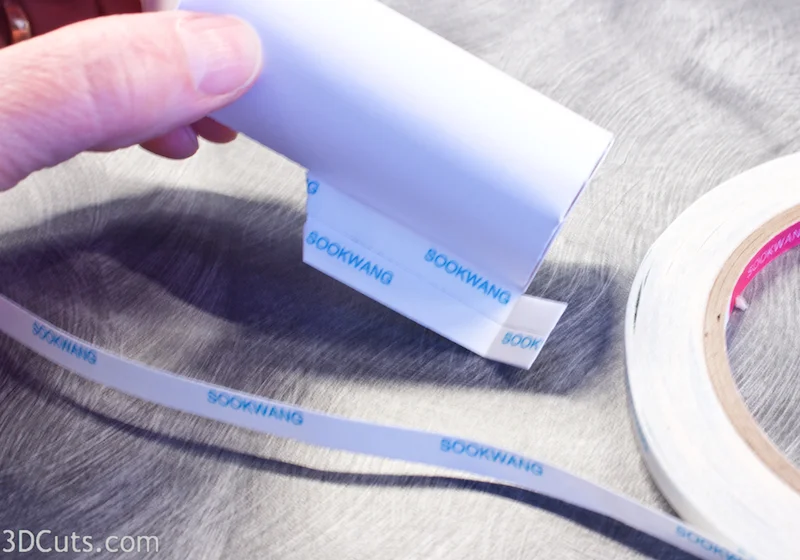
- Place strips of Scor-Tape on all tabs on the barn. Leave the backing on the Scor-Tape.
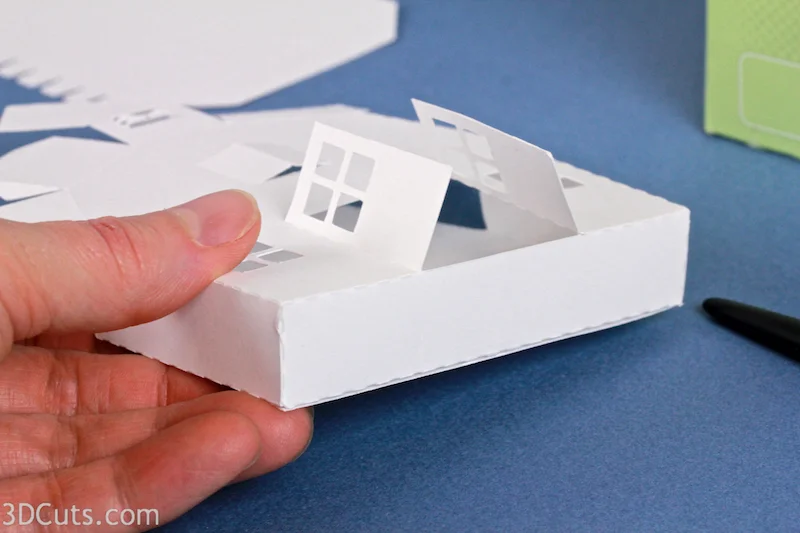
6. Glue all seams starting at the base.
- I like to apply Scor-tape to all tabs, leave backing on and peel as needed.
- It is important to make square corners. I start at the bottom and get that even and then move up to the roof line.
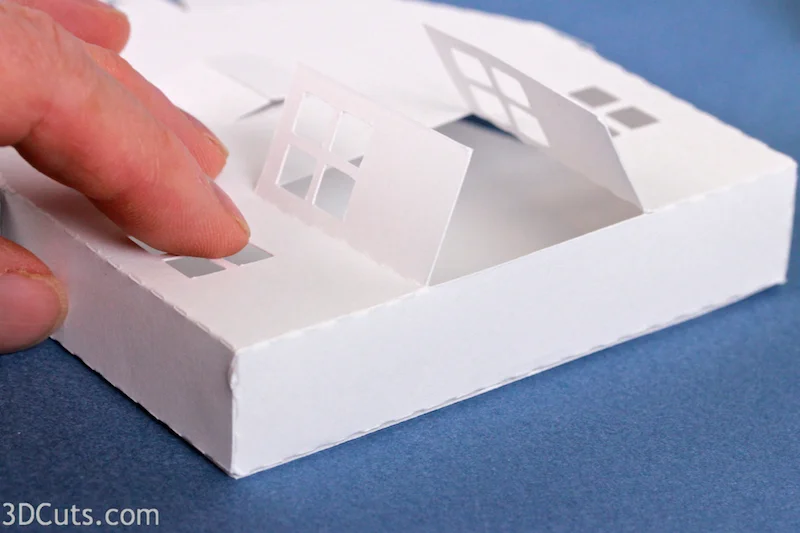
- After getting the base square, I glue the side seams together.

- Position the roof flaps and glue in place. (Note- design change. The cutting files in 3dcuts don't have the flaps on the cupola. Instead they have cut out vents.)
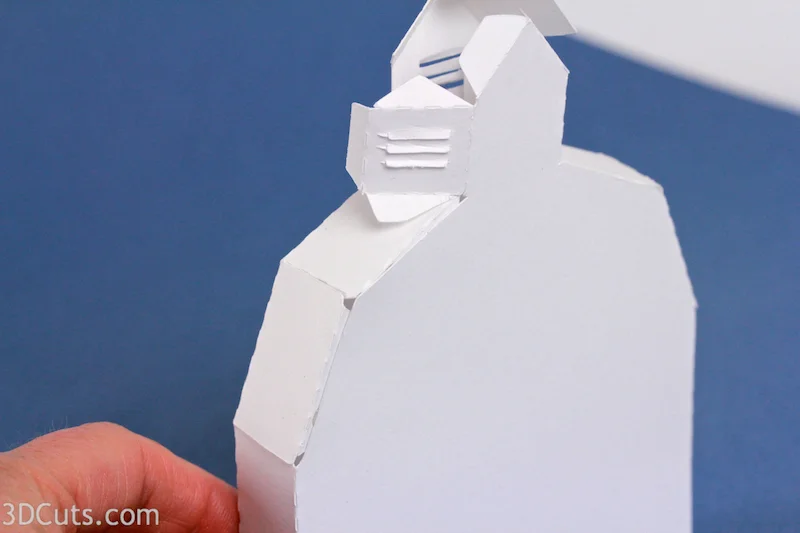
- Position the sides of the cupola and glue those into place.
- Note- It is on these tiny flaps that I might still use glue dots, or even glue dots that have been cut in half.

- Position the roof on the cupola and glue that into place.
- The two extra roof pieces get glued on next. They are flush with the back and have an over-hang in front.
- The notch of the larger roof piece slides around the cupola.
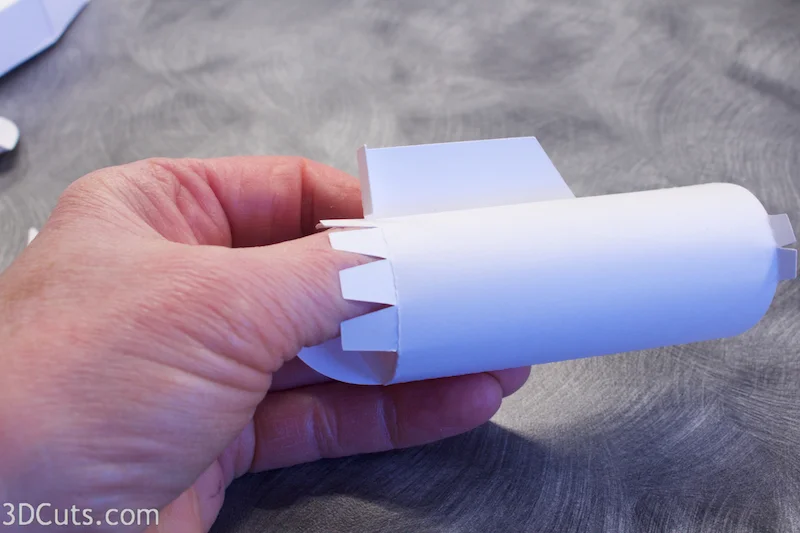
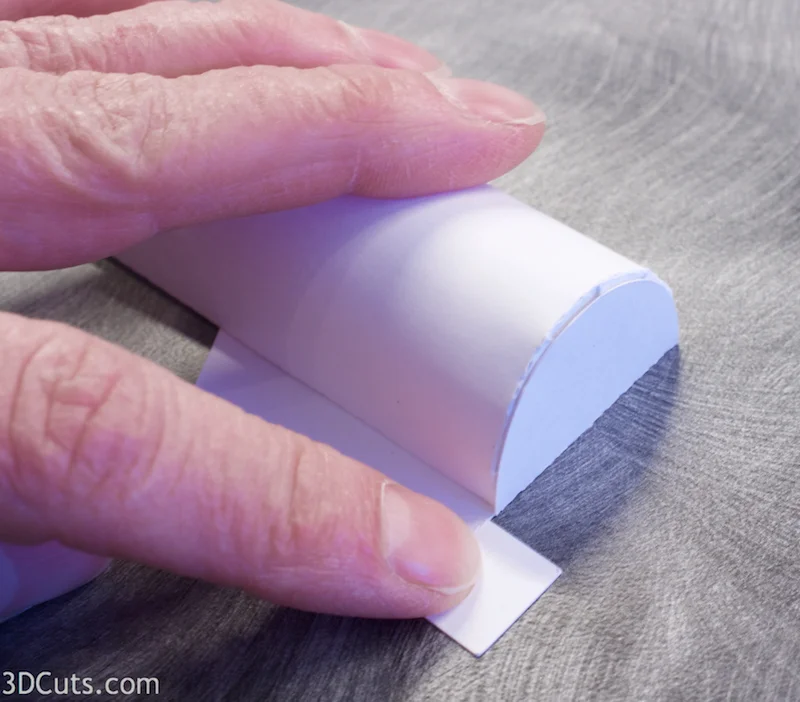
7. Build the Silo.
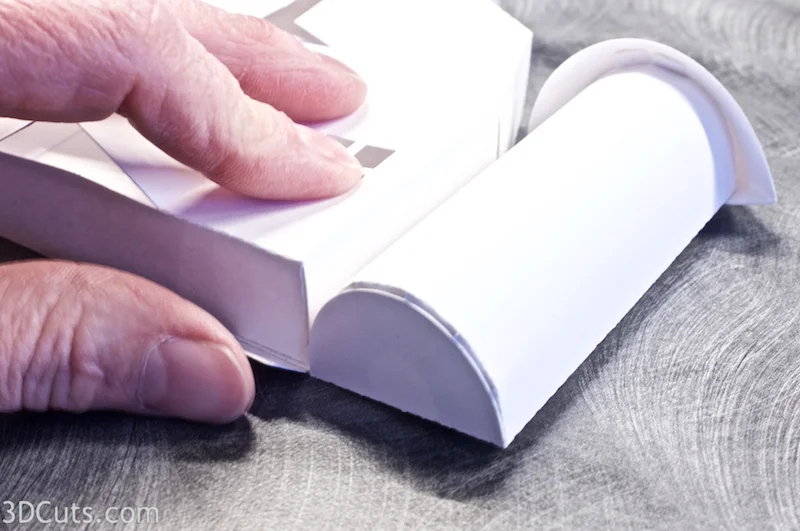
- First pull the silo over the edge of your desk to curve the paper in the direction of the silo curve.
- Glue the tab of the silo and fold it into place. I used Scor-Tape for this seam.
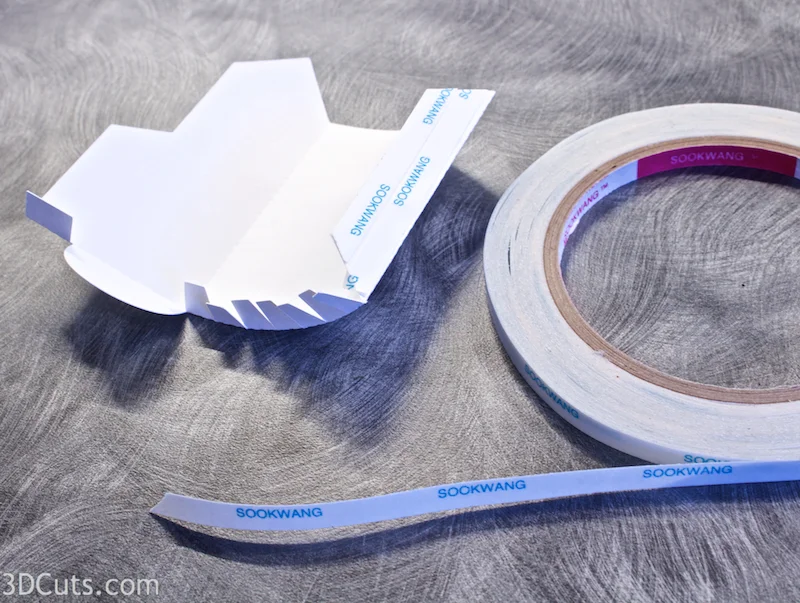
- Put adhesive on all the little tabs on the bottom of the silo.
- Fold the semi-circle base up to cover all the tabs.
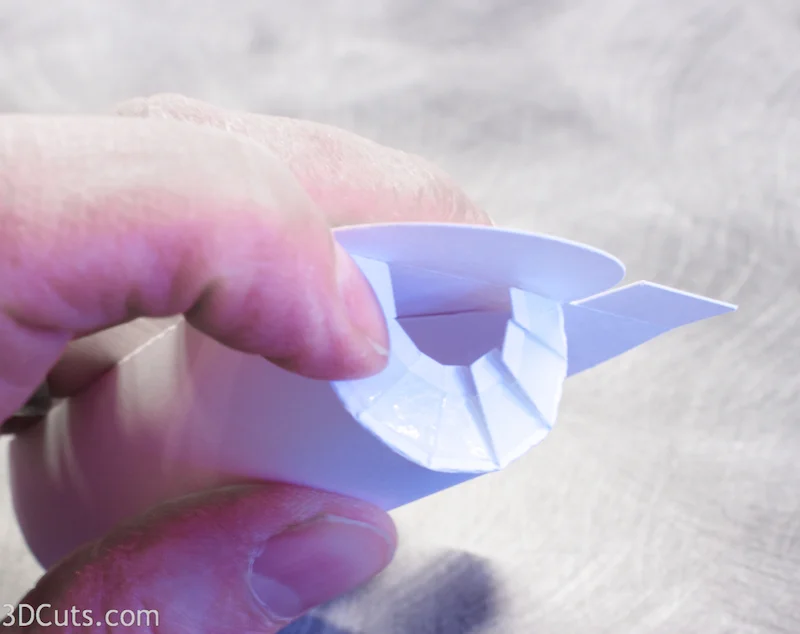
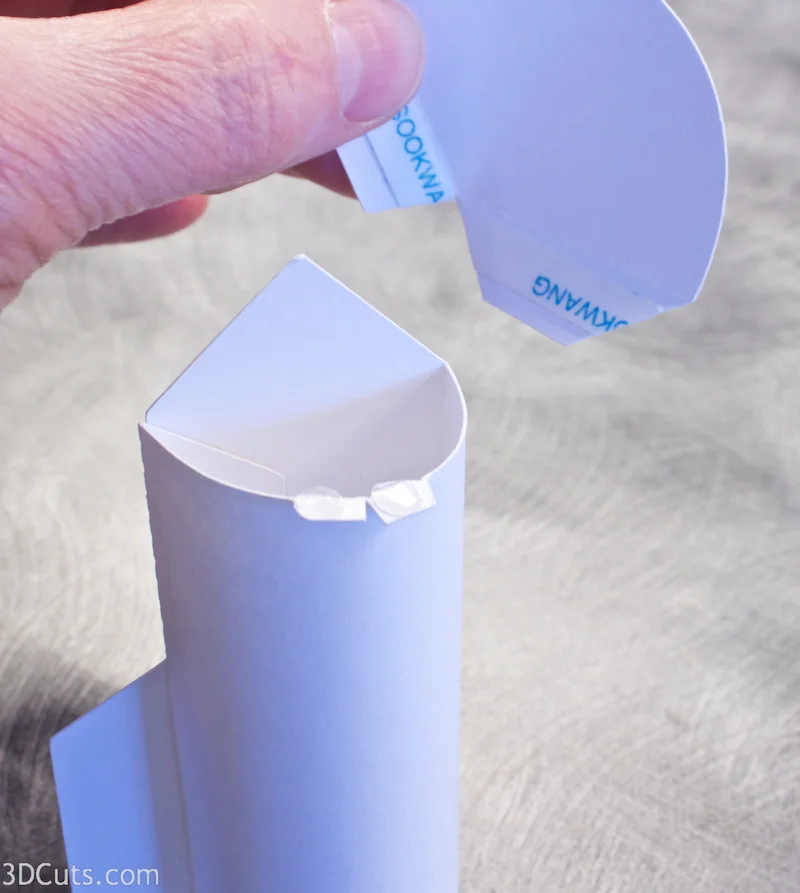
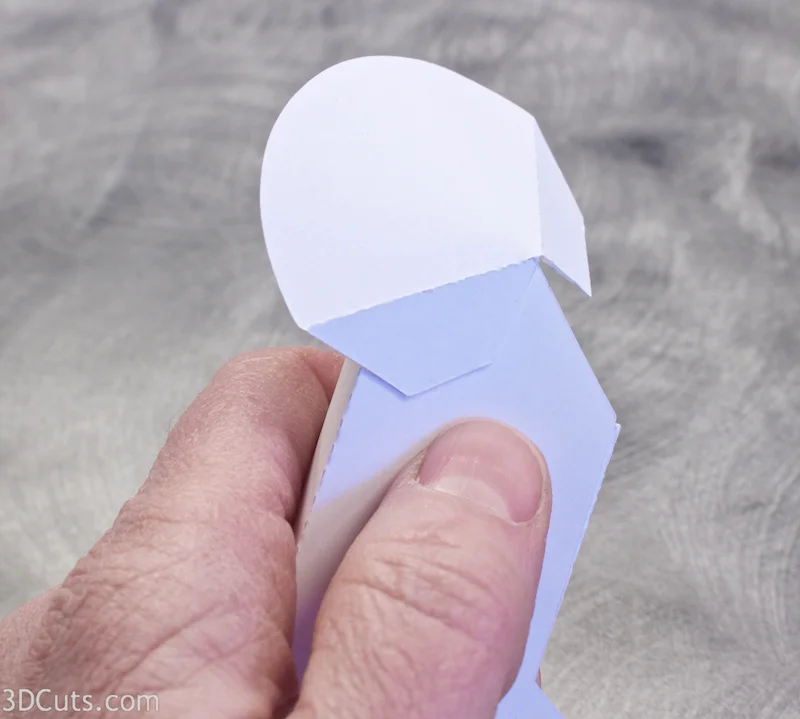
Add the roof to the silo.
- Pull the card stock over the edge of a table to give it some curl in a cone shape.
- Apply Scor-Tape to the 2 tabs on the roof and glue dots to the 2 tiny tabs on the top front of the silo wall.
- Attach one tab t the back of the silo triangle, wrap the roof around connecting with the front tabs, and bring it to the other side of the silo triangle, attaching it there.
- Use tweezers to squeeze the front tabs and hold the roof on.
- The side tab on the silo gets glued onto the back of the barn with a bottom tab folding under the base.
- Apply Scor-Tape to those tabs and adhere the silo to the barn.
Add some fences and you are set for adding this to your Ledge Village.
How will you display your village?