
Tutorial - Ledge Village Firehouse
Project Description:

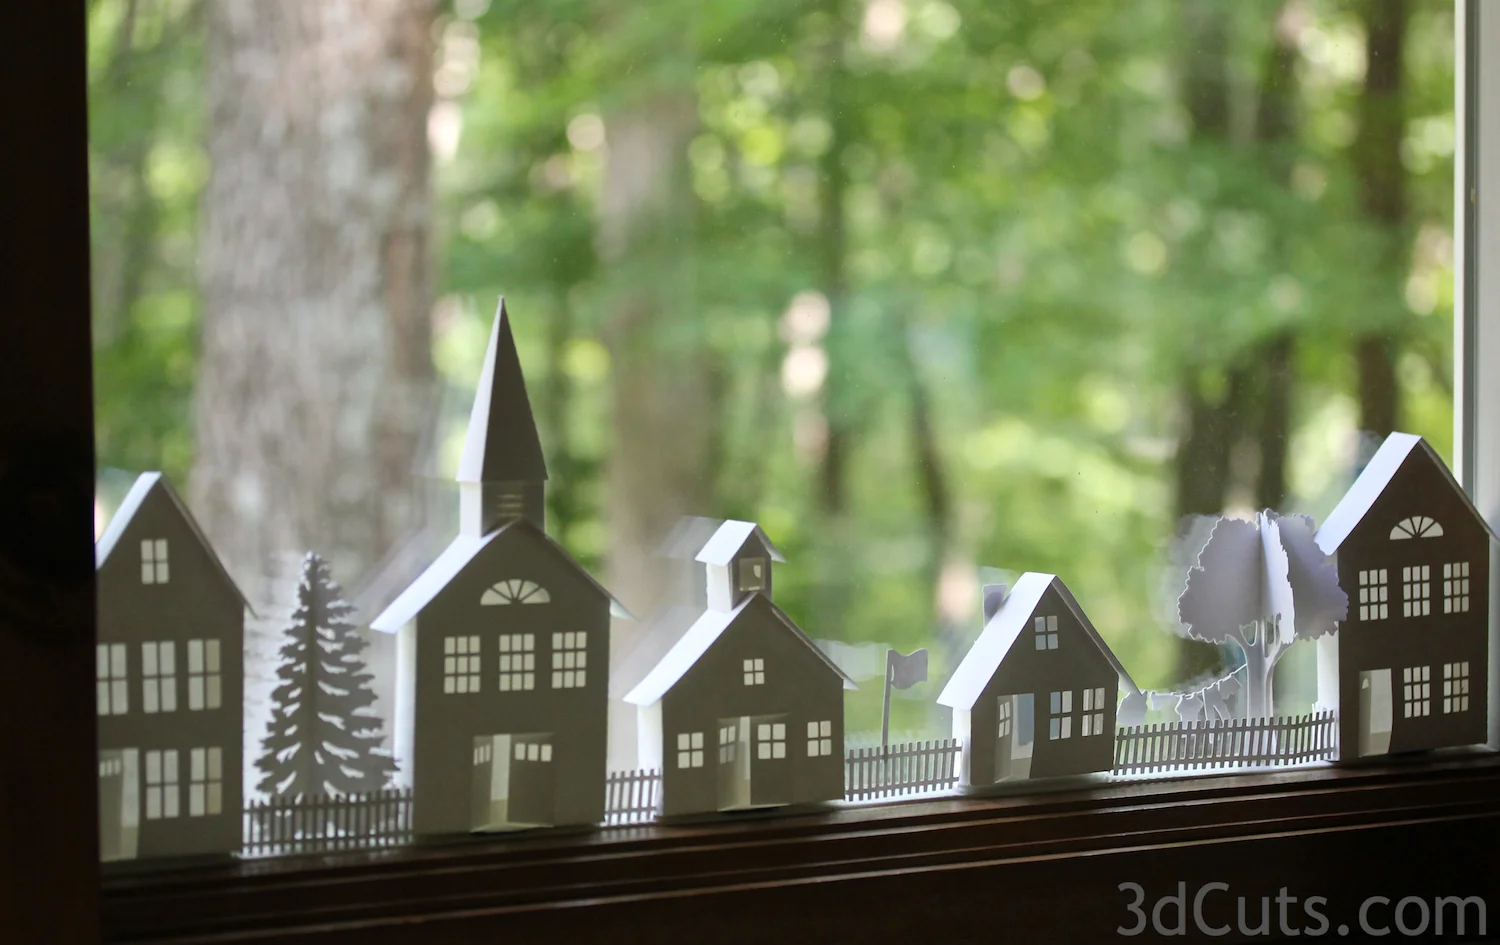
The Ledge Village is series of 3D buildings and accessories that can be combined in a mix and match fashion to build tiny villages on small ledges around your home. The buildings are thin, with all detail on the front so they fit on small trim ledges. A growing number of files for Ledge Village can be found at 3dcut.com
This tutorial is for the Firehouse.
Note: Ledge Village cutting files are available here on this website and at the Silhouette online store. You can purchase them as grouped files here for a reduced priced.
Supplies Needed:
- Cutting File downloaded on 3DCuts.com here
- Your preferred adhesives
- Glue Dots
- Scor-Tape
- Zig Glue Pen
- Scotch Tape
- Card Stock
Parts Sizes:
(For people importing into Cricut Design Space)
- Building and all parts - 6.8743" w x 9.477" h
Steps for completing the 3-D Ledge Village Firehouse project:
1. Download the cutting files for your cutting machine here.
2. Load the files into your cutting software following the steps for your cutting machine.
3. Prepare the files:.

4. Cut the files:

- Paper colors are your preference. I like the simplicity of the all white but others have used a variety of card stock with great results. The file is grouped together. You can ungroup it in order to cut various parts from different papers.
- The windows and smaller details (like the picket fence) require you to understand how you cutting machine and blade best cut details. I find working with a good blade and mat and my Silhouette cut settings set on Card stock with a blade of 3, a speed of 4 and a thickness of 24 works nicely.
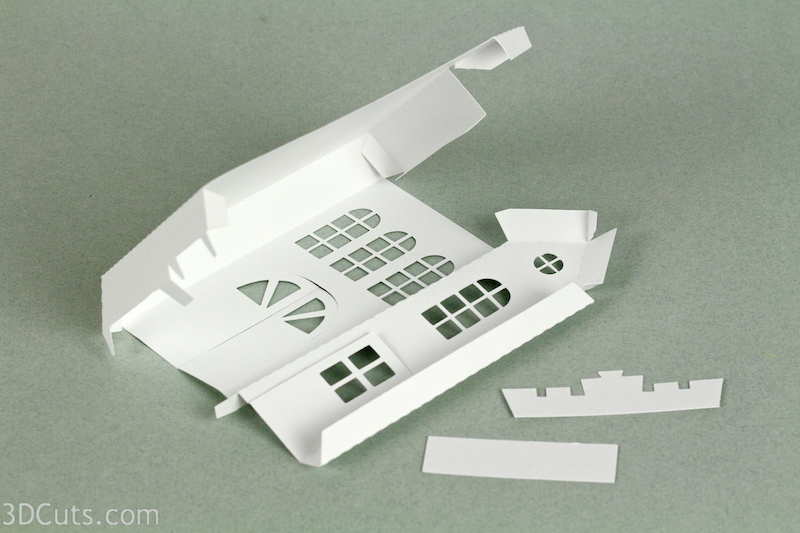
4. Fold the Station front.
- Note each cut file has dotted lines. These are fold lines.
- Fold all the dotted lines inward except the front inset going back to the tower door. That folds in the opposite direction.
This is the dormer house. I have added Scor-Tape to all the main tabs before starting assembly. I like this type of adhesive for this project.
5. Building Assembly
- Some general notes: I have constructed many ledge houses over the years. My adhesive preference is always choices that keep my fingers dry and clean, but I also want permanence. We all have favorite adhesives and many work. For a long time I used glue dots extensively and many of the photos in this tutorial show glue dots. I still use them in selective places but I have combined them with Scor-Tape. I especially like Scor-Tape because I can apply it to the tabs but LEAVE THE BACKING ON until I want to position a tab. I find that I can be more precise in placement using this technique. I use fine point tweezers to peel off the backing. This allows me to reach into a seam and pull the backing off as I press in place.
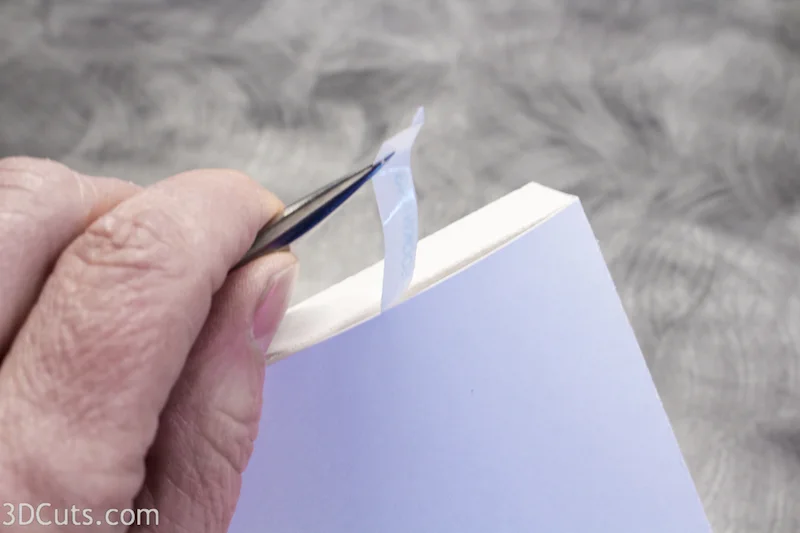
I use needle nose tweezers to peel the backing off the Scor-Tape after the paper is in position. I get better placement using this technique.
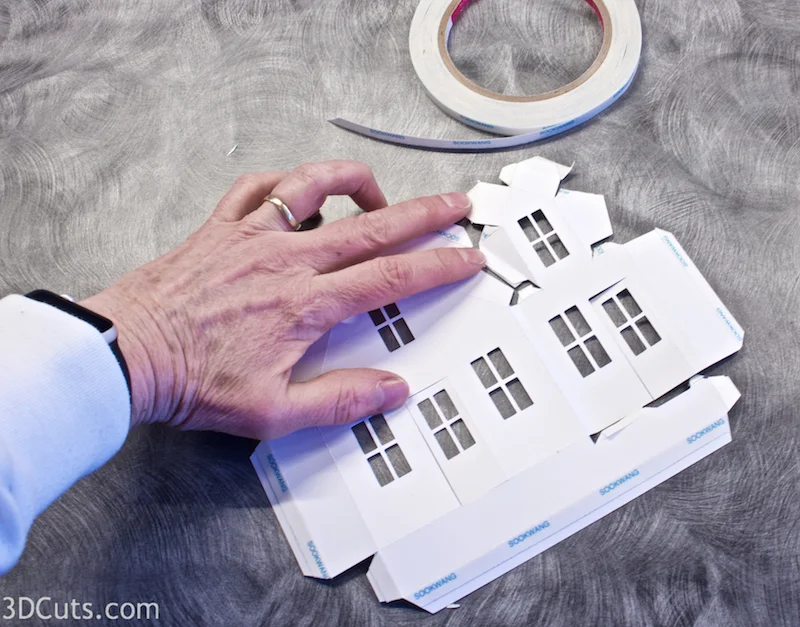
- Place strips of Scor-Tape on all tabs on the main building. Leave the backing on the Scor-Tape.
- You might want to wait on those around the dormer until you understand which sides get adhered.

6. Glue the station front together.
- Apply adhesive to the tabs.
- It is important to make square corners.
- You start this building by positioning the floor. Start at the large door end and glue the tab so as to create the square corner.
- Next position the floor in the corner that steps back from the double doors to the single tower door. This is where you'll see how one of the folds needs to go in the opposite direction.
- Glue that in place.

- Finish the last corner for attaching the floor base.

- Next glue up the long side seam, attaching the back to the side. Keep things square.

- Glue the peak of the tower together.......

- And then glue the peak under-roof to the back.

- Add Scor-Tape or glue dots to the tab on the roof and glue that behind the front wall.

- The decorative cornice just gets glued to the front.

- The roof cover is longer on one side than the other. The long side goes to the outside of the building and the short side goes in toward the center.
- Glue the roof cover in place with the over-hang all on the front.

- Done! What building will you make next?
Ledge Village by Marji Roy of 3DCuts.com
And where will you display them?