
Ledge Village - Fullerton House
Project Description:

The Ledge Village is series of 3D buildings and accessories that can be combined in a mix and match fashion to build tiny villages on small ledges around your home. The buildings are thin, with all detail on the front so they fit on small trim ledges. A growing number of files for Ledge Village can be found at 3dcut.com here.
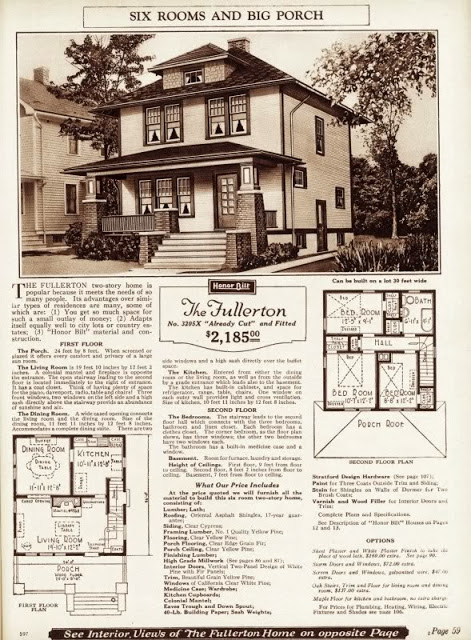
This tutorial is for the Fullerton House. I thought the village needed a greater variety in house styles. I decided to incorporate an American Classic into the mix by choosing a Sears & Roebuck House. This design is based on a kit house sold through the Sears and Roebuck Catalogue back in the 1920's. The Fullerton was model No. 3205X and it sold for $1633 to $2,294!
Note: Ledge Village cutting files are available here on this website and individually at the Silhouette online store. You can purchase them as grouped files here for a better price.
Supplies Needed:
- Cutting File downloaded on 3DCuts.com here
- Your preferred adhesives
- Glue Dots
- Scor-Tape
- Card Stock. I especially like the Neenah Premium Card Stock 65 lb available at Amazon.
Parts Sizes:
- These measurements apply to files download from 3dCuts.com in SVG, PDF, PNG, or DXF formats. The Silhouette files are assembled in a single file and these measurements don't apply.
- Main building- 7.2322" w x 9.759 h (File 1)
- Parts file (File 2 - grouped together) - 7.761" w x 10.2862" h

Steps for completing the 3-D Ledge Village Fullerton House project:
1. Download the cutting files for your cutting machine from 3Dcuts.com.
2. Load the files into your cutting software following the steps for your cutting machine.
3. Prepare the files:.
- For the Silhouette: The SVG files from this site will need to be turned into cutting files. Click here for detailed steps on how to use SVG files on your Silhouette. http://www.3dcuts.com/tutorial-upload-svg-silhouette
- For the Silhouette files from the Silhouette online design store: This download comes in one long file with cut lines already enabled. You will need to ungroup the file and then copy and paste the parts into separate page sized files to cut. All the text instructions are non cutting items.
- For Cricut Explore: Here is a guide for importing into Cricut Design Space. http://www.3dcuts.com/tutorial-adding-3dcuts-files-to-cricut
- Each piece will fit on 8.5 x 11" card stock. You will need to cut and paste the pieces to different pages to cut. I cut the main house from one piece of card stock and all the other pieces from another.
4. Cut the files:
- Paper colors are your preference. I like the simplicity of the all white but others have used a variety of card stock with great results. The file is grouped together. You can ungroup it in order to cut various parts from different papers.
- The windows and smaller details (like the picket fence) require you to understand how your cutting machine and blade best cut details. I find working with a good blade and mat and my Silhouette cut settings set on Card stock with a blade of 3, a speed of 4 and a thickness of 22 works nicely. I especially like the Premium blade for detail work.
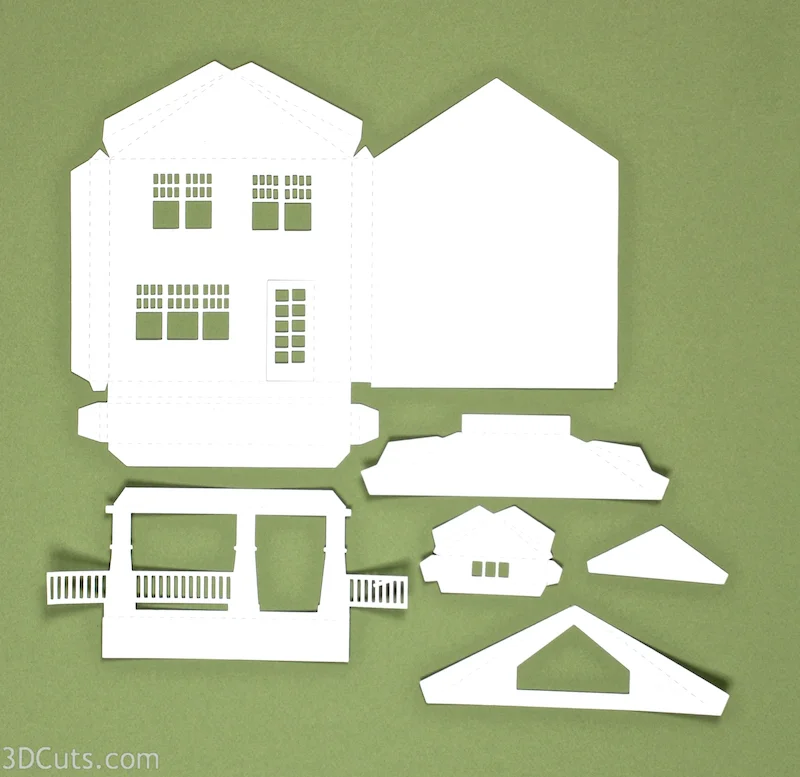
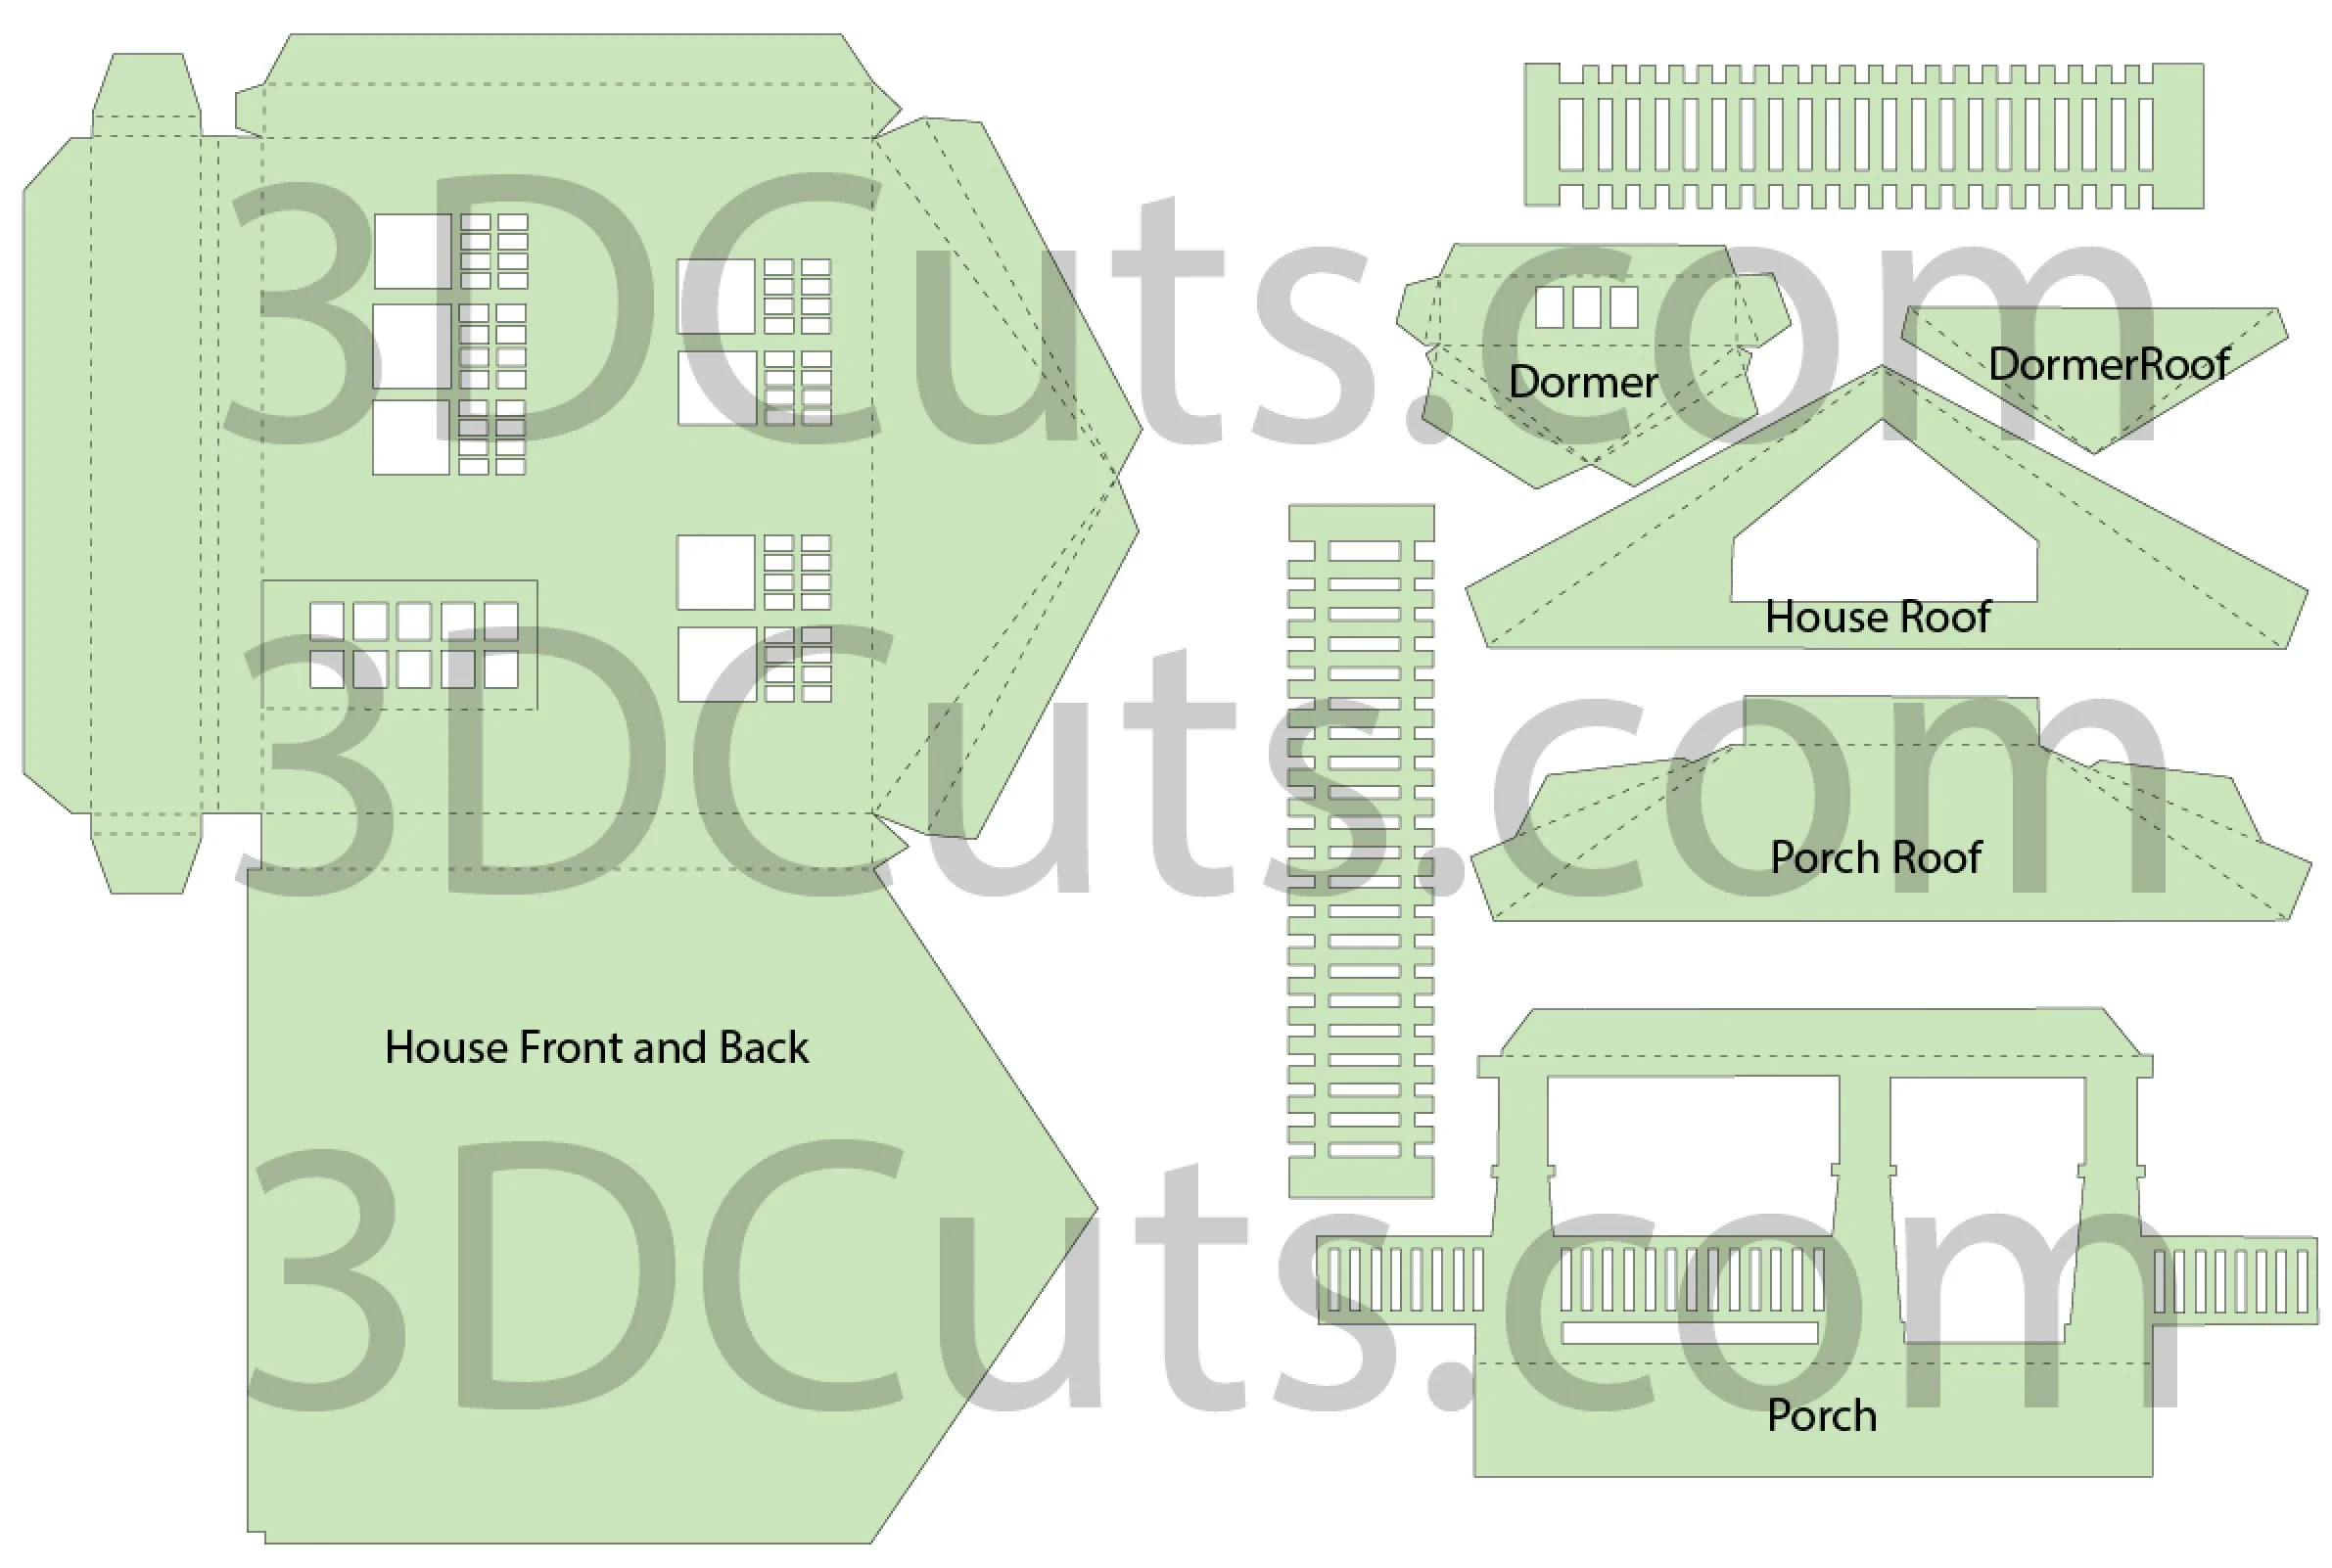
- Below is a diagram of all the pieces and the terms I will use in this tutorial for assembly.
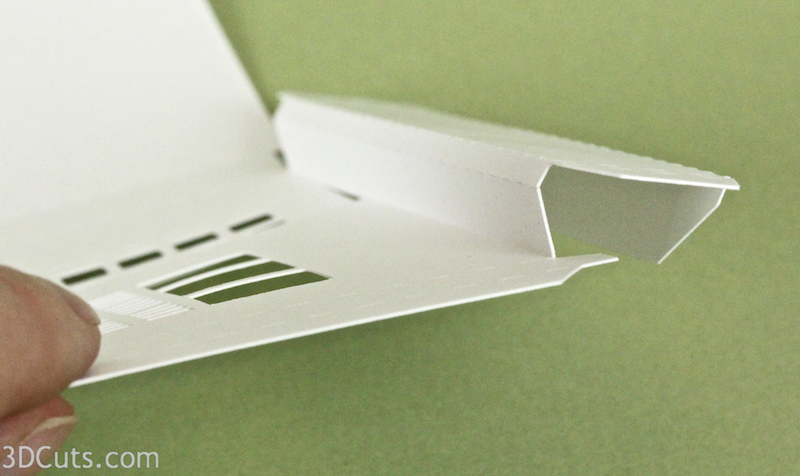
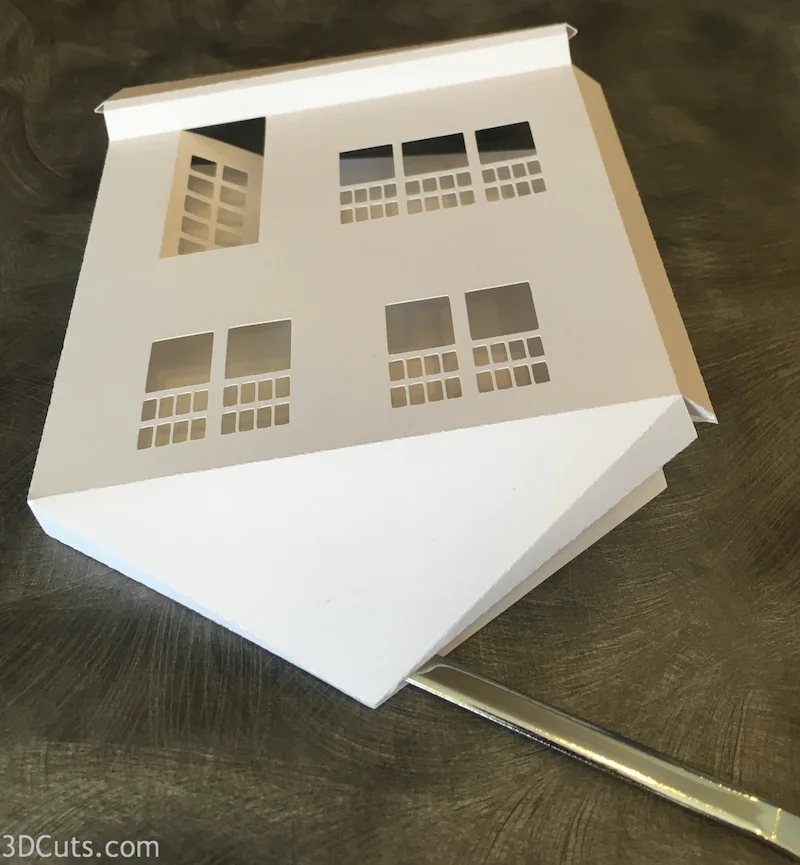
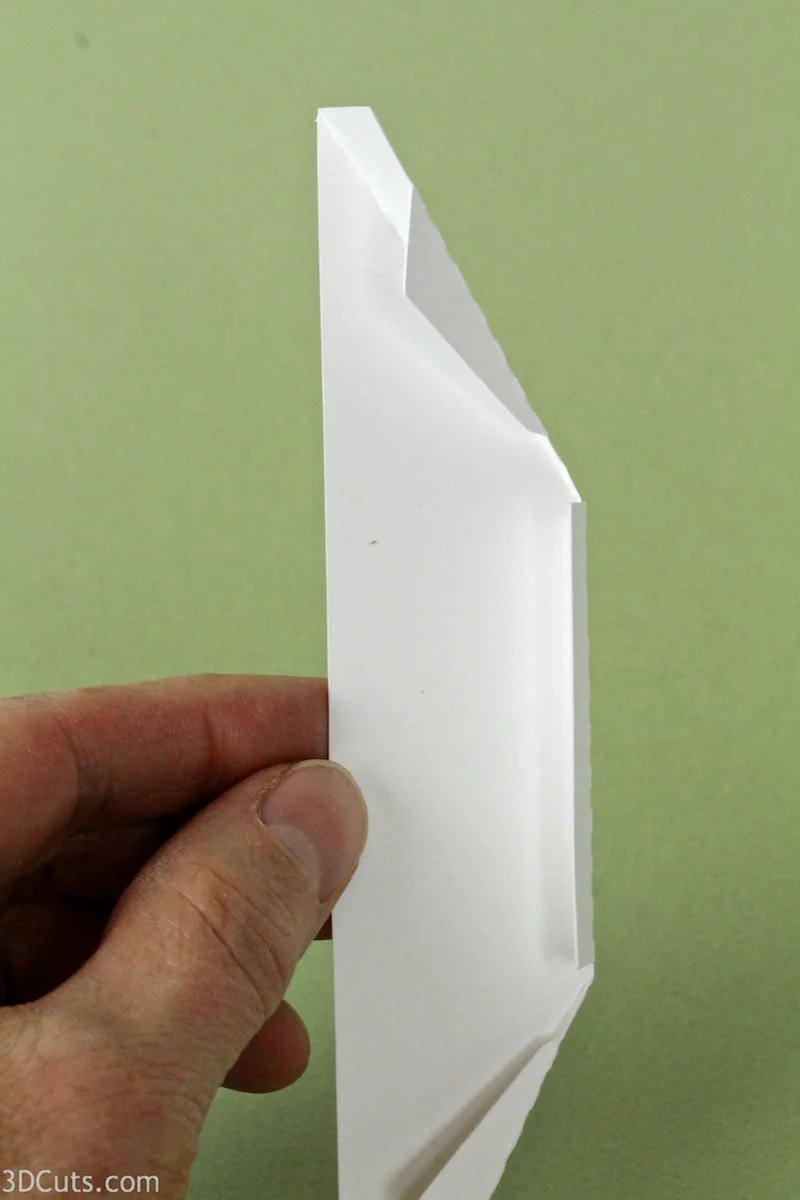
5. Fold the house front.
- Note each cut file has dotted lines. These are fold lines.
- Fold all the dotted lines inward except the front porch floor attached to the bottom of the house. That folds one fold outwards ( toward the front) and the other folds in the opposite direction (toward the back. This is highlighted in the first photo below.

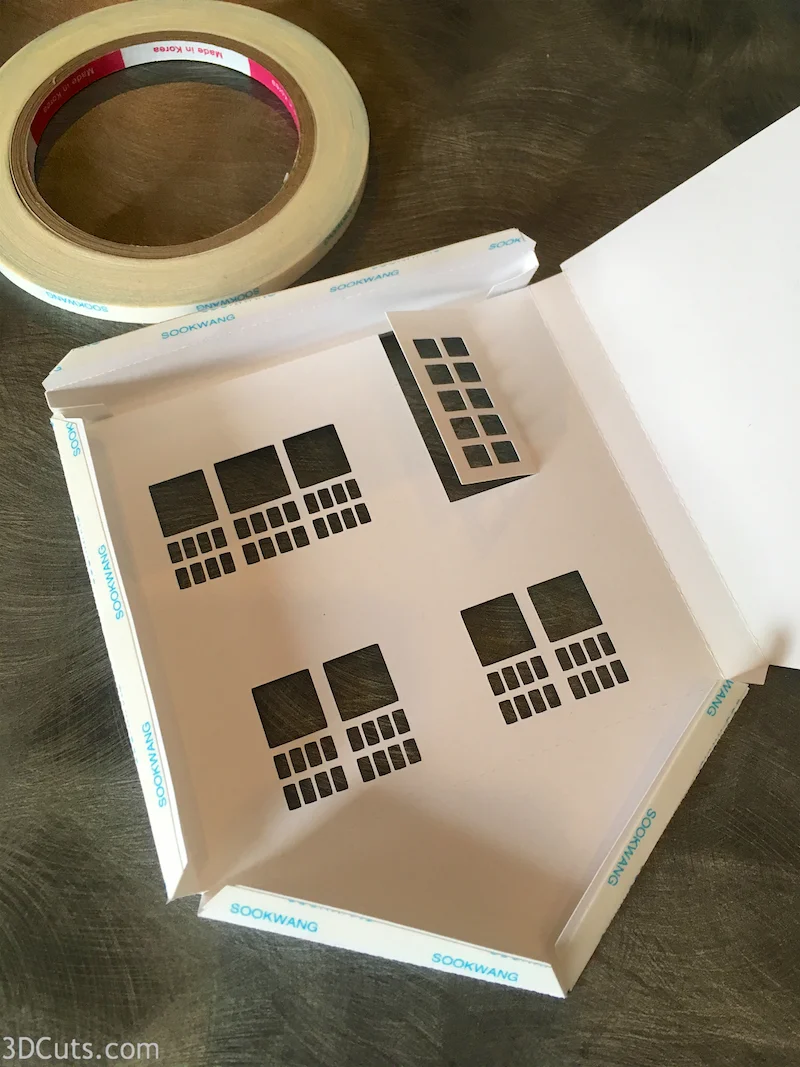
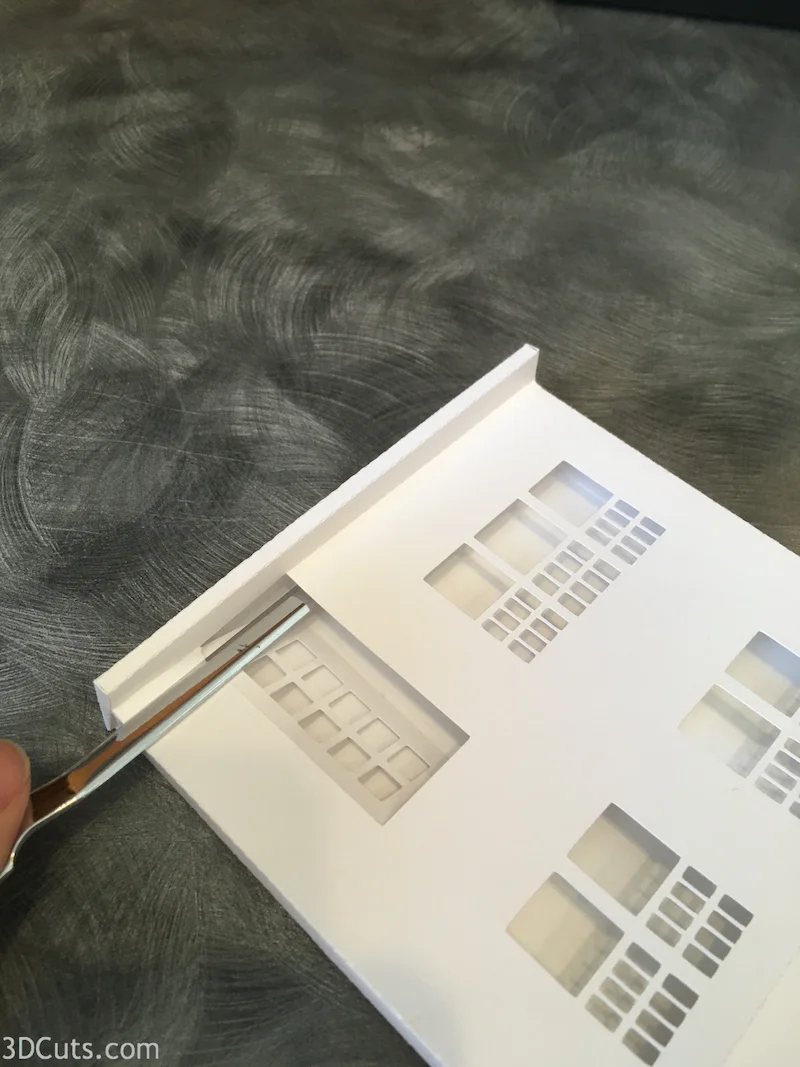
6. Add Scor-Tape adhesive to the main tabs on the houses shown in the photo. Leave the backing in place.
- Over the years I have used many different adhesives for making the Ledge Village Houses. I have found that Scor-Tape holds best on 3D projects. I also like that I can remove the backing as needed which helps in assembly.
- Score-Tape gets applied to the two roof tabs, the side tab of the house, and on the opposite side of the tab along the bottom edge. If you aren't sure which side to apply the adhesive strip on the bottom, wait until later and it will make sense.
7. Glue the house together.
- First, peel the backing from the Scor-Tape on the roof section closest to the center of the piece.
- Carefully position it so that it lines up with the roof line along the house back.
- Press in place. I have a skinny letter opener that I use to insert and press. Press all seams together well is important.
- Placement is important. If you place these tabs poorly the house will have a twist to it so keep things square as you work.
- Peel of the backing for the second roof tab.
- Attach the second half of the roof again paying carefully attention to placement making sure the basic house stays square.
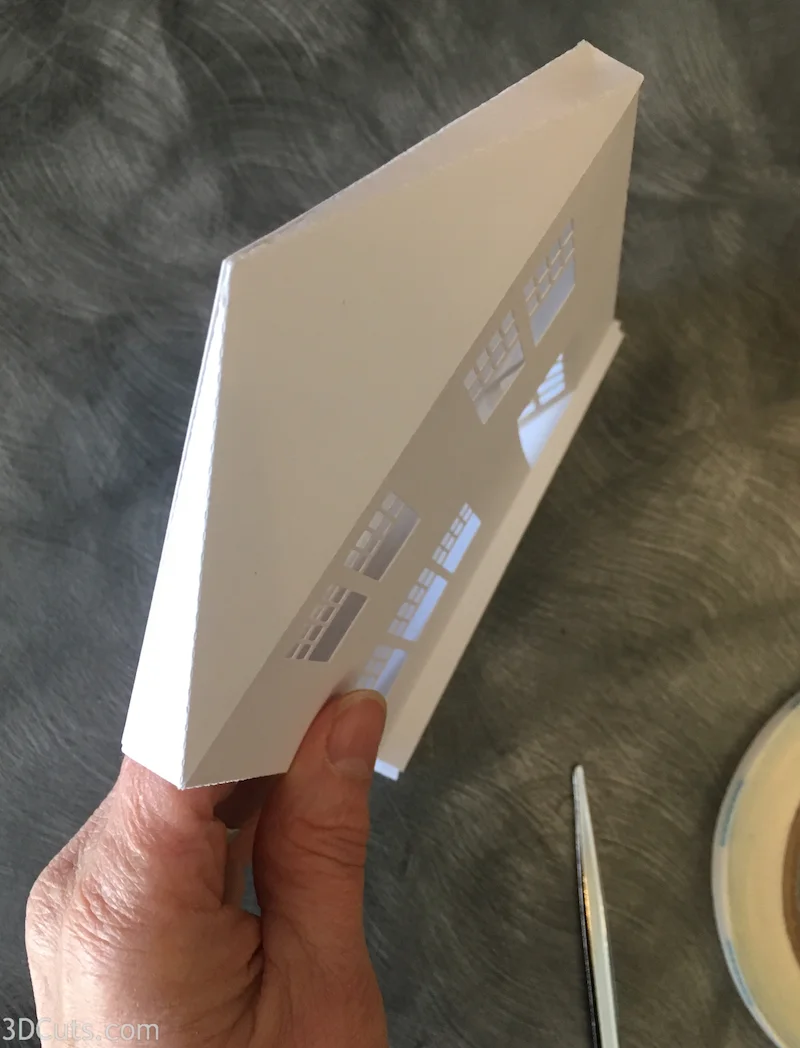
- Peel off the backing of the strip of Scor-Tape along the side seam of the house, and again keeping edges lined up carefully press in place.
- Again use something ling and skinny to insert up inside and press well.
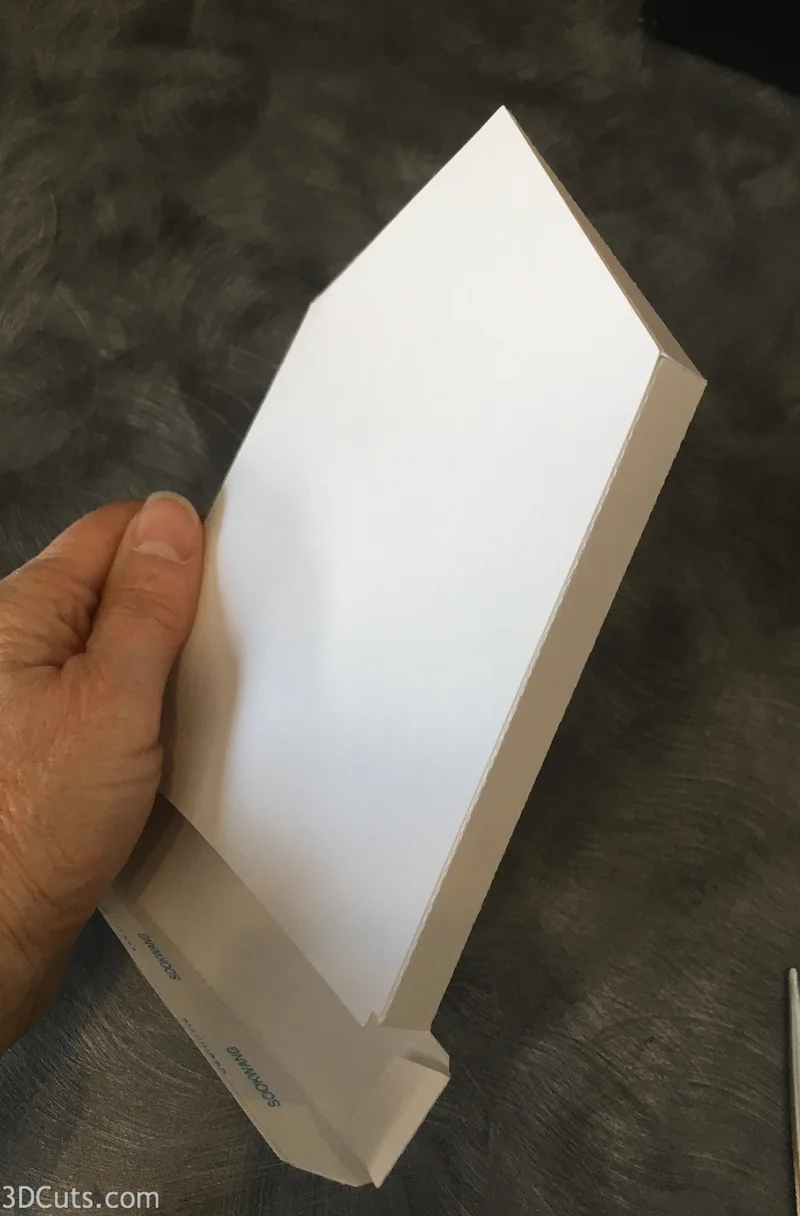
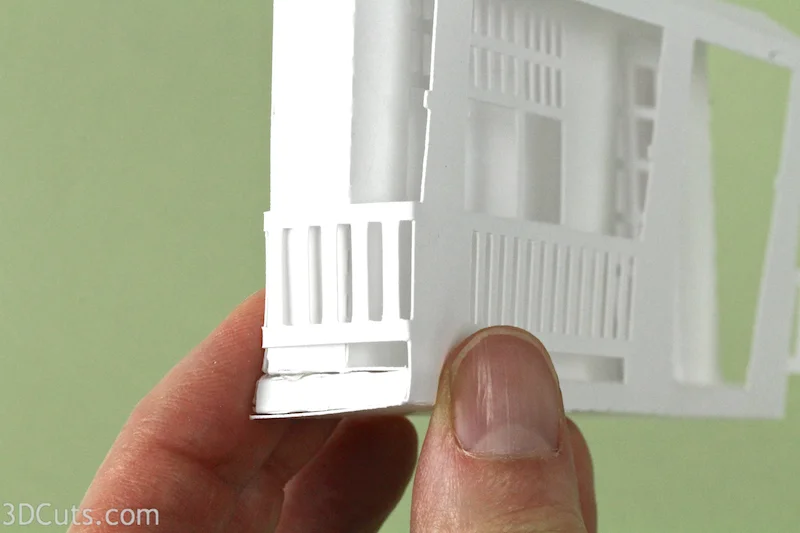
- The porch floor and house base gets glued in place next.
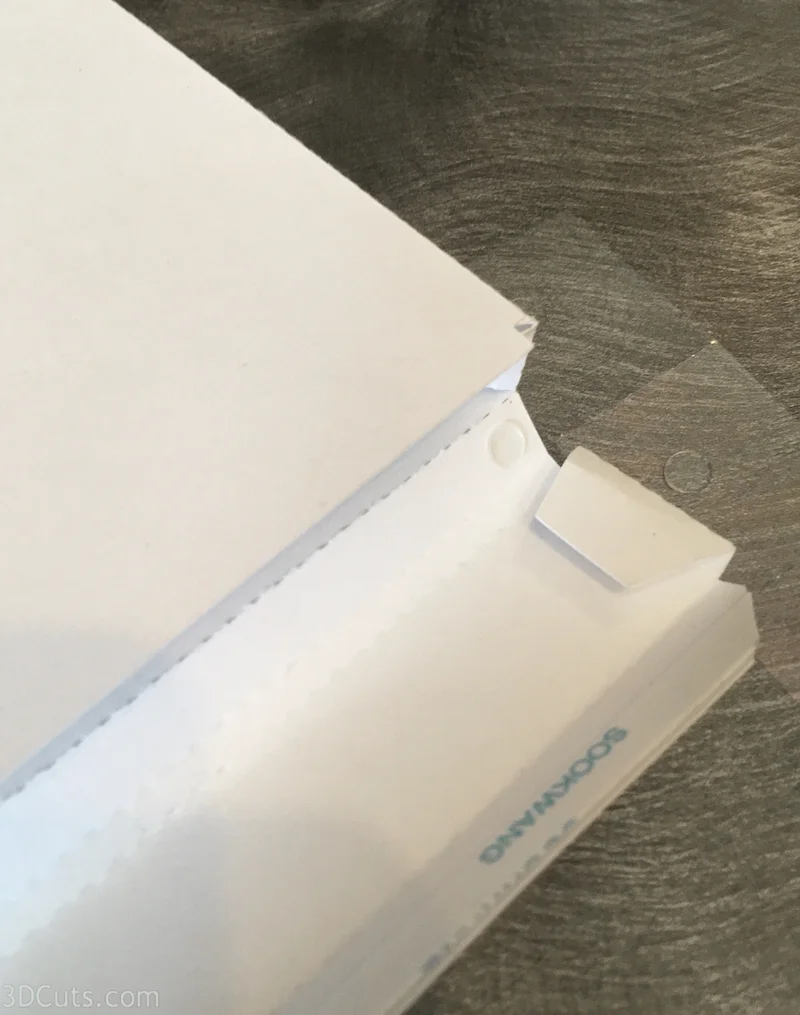
- On each end of the base there is a little tab that fold is to form the end of the porch. Place a glue dot to hold this tab in place once you position the floor to glue it. Do this on both ends.
- At this time you can position the porch floor and see how the end flap wraps around and adheres to the back of the house. The Scor-Tape strip needs to be on the inside of this tab. Put it there if you didn't in the earlier step.
- Peel the Scor-Tape off the bottom tab. Fold the base piece into position. It goes forward from the house, down, and back. At this point make sure the end tabs are in place to close off each end of the base.
- The base piece folds toward the back and then the bottom tab folds up behind the house and gets adhered along the back base,
- Always be careful to make square folds and adhere things together in alignment.
- Insert the letter opener and press the back seam.

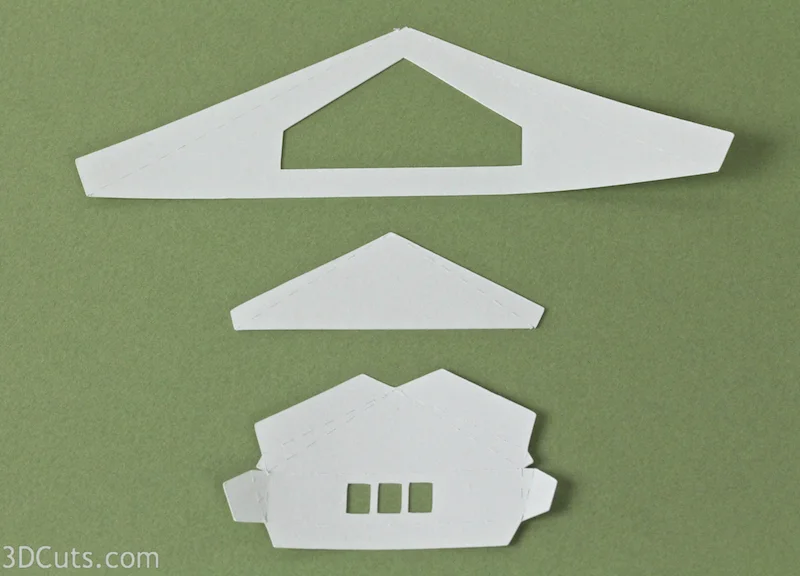
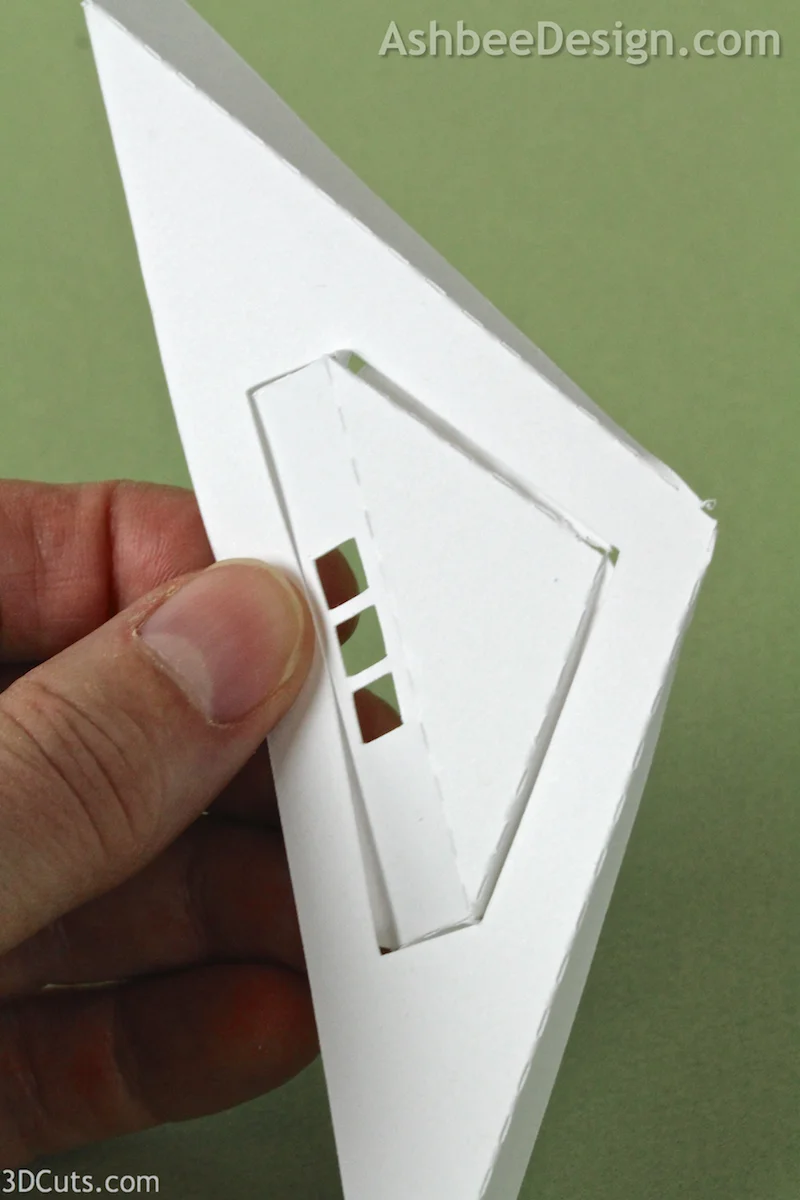
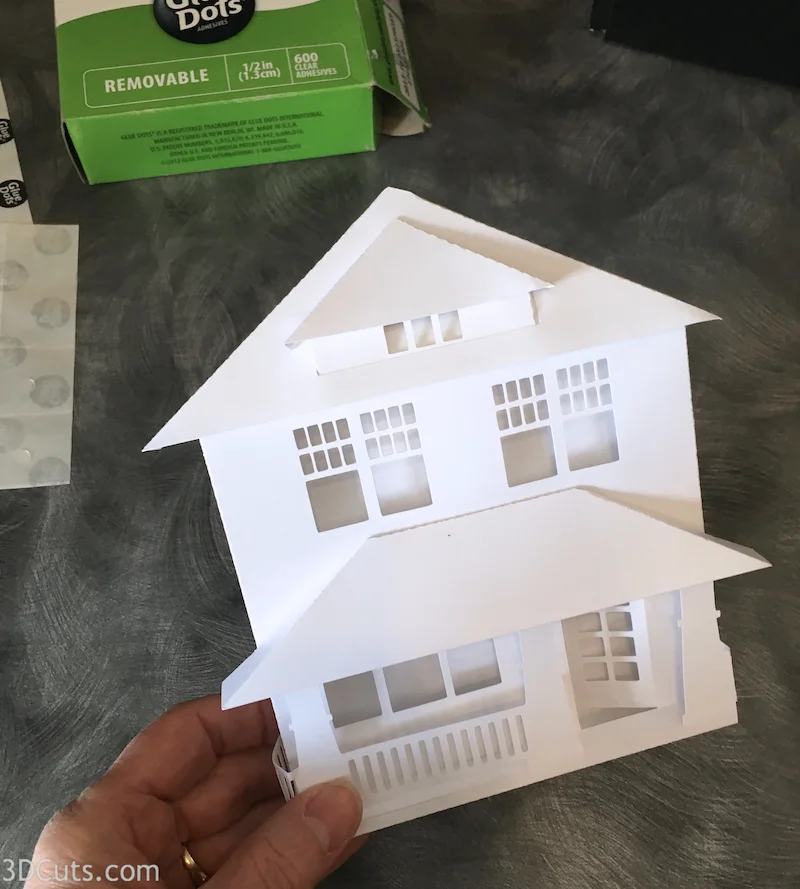
8. Build the dormer and add to roof.
- Locate the 3 pieces shown - the dormer, dormer roof and house roof.
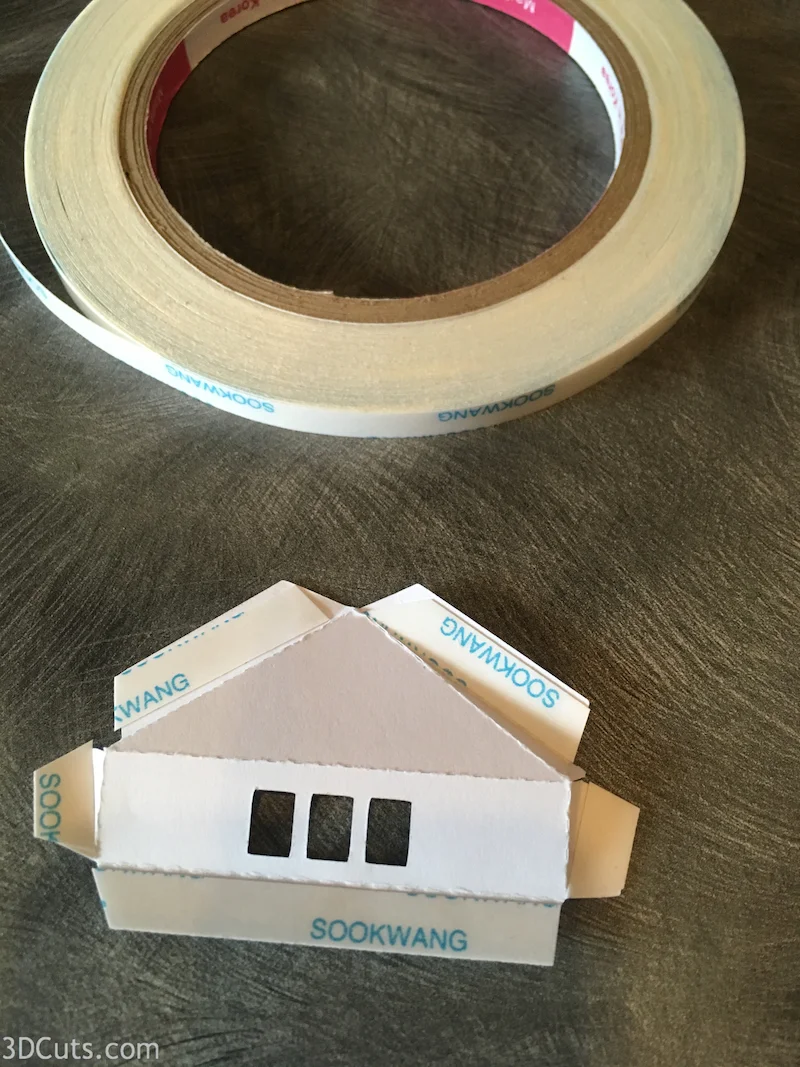
- The dormer has multiple tiny folds. Fold and crease each carefully.
- The roof sides and dormer sides are all folded back. (Shown below in red.)
- The holding tabs are all folded forward. (Shown below in blue.)
- Repeat on the side not visible in the photo as well.
- Also fold and crease on the two fold lines on the house roof.

- Put Scor-Tape onto all of the holding tabs. There are 5 tabs and score-Tape should be on the front side of all 5 tabs.
The dormer will be placed in the house roof from the back. All of the holding tabs will be adhered to the back side.
Slide it into place and understand its positioning before removing the Scor-Tape backing.
Once you understand the position, remove the backing tape and adhere the dormer in place (below).
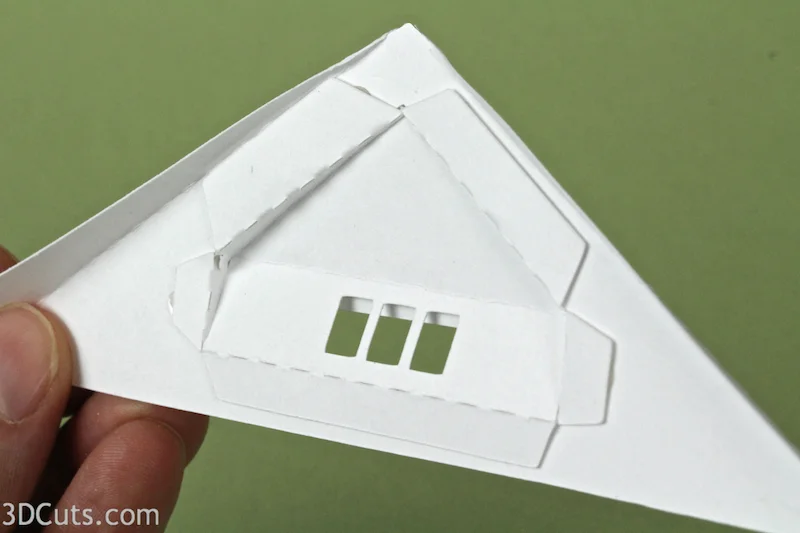
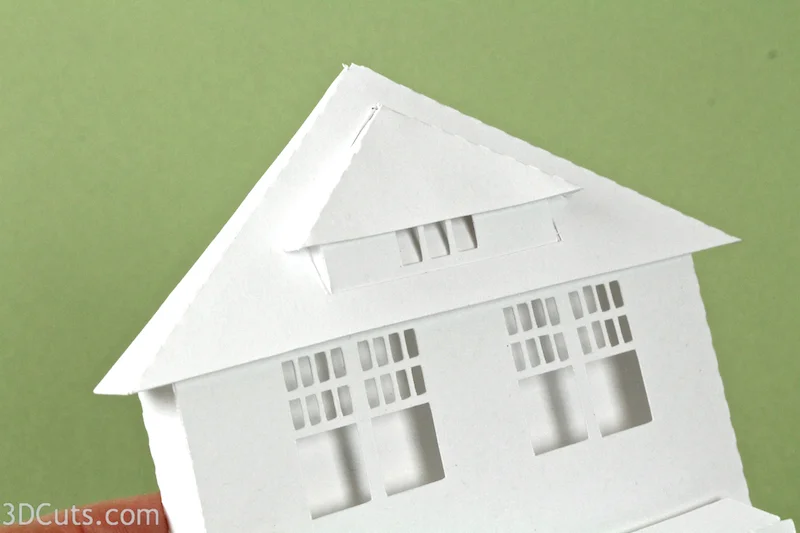
- Apply Scor-Tape to the inside of the house roof and adhere to the top of the building.
- Apply Scor-Tape to the inside of the dormer roof and add that to the dormer.
9. Add the front porch.
- The top tab and bottom tab on the front porch get folded and creased along the dotted lines toward the back.
- Apple Scor-tape to the inside of the bottom tab and glue that in place.
- The fold on the porch will align with the front of the base on the house and the porch will fold up in front of the base.
- Note: The top tab is not glued to the house. It is instead glued to the inside of the porch roof in a later step.
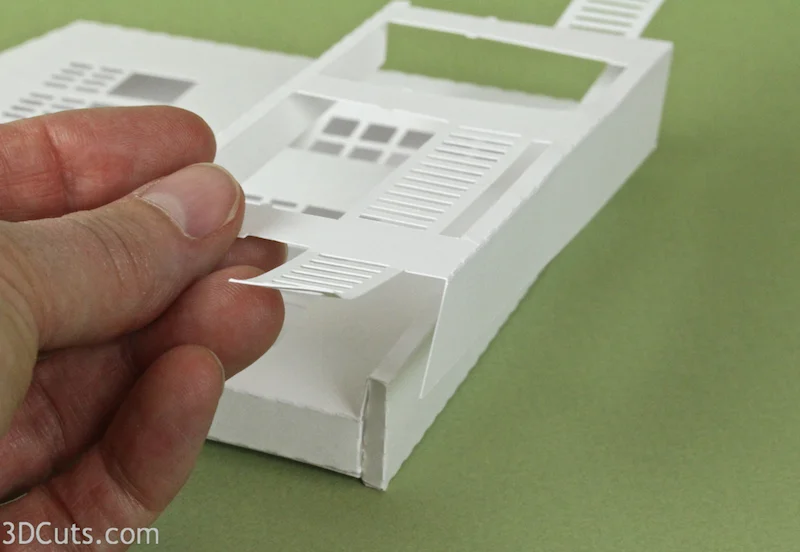
- Fold back the porch railing, then fold it behind the house and glue it in place on the backside.
- Make these folds square to help hold the porch in alignment.
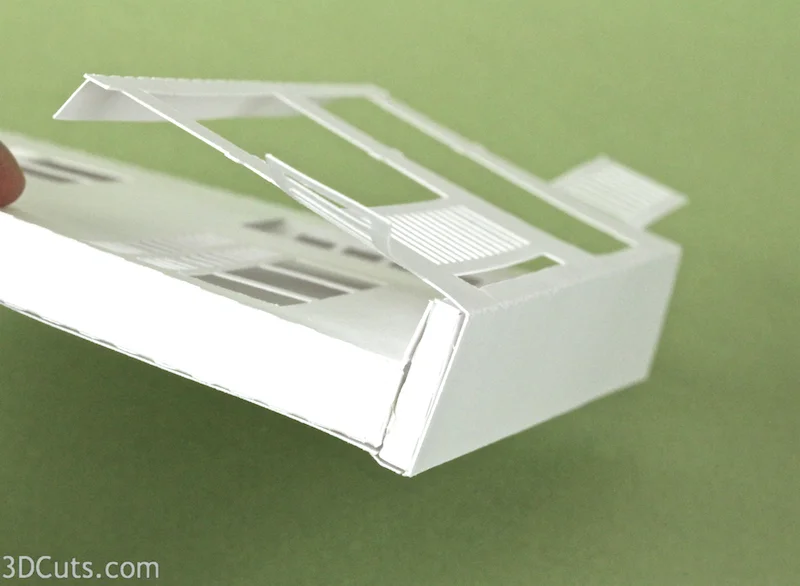
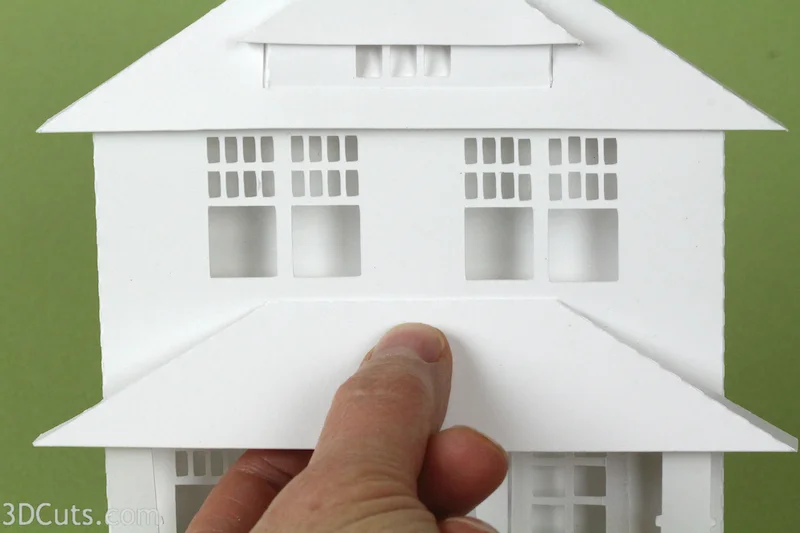
- Add the porch roof.
- Fold back along all the dotted fold lines on the porch roof.
- Add adhesive to all three tabs.
- The porch roof get centered (left to right) on the front with the top being 1/8" below the upper windows.
- Position the top first and press into place.
- Make sure the side tabs are folded in and adhere those in place as well.
Your Fullerton House is now complete.
Make other buildings from the Ledge Village Collection designed by Marji Roy of 3dcuts.com. This collection continues to grow.
For display ideas for your buildings check out http://3dcuts.com/ledge-village-ideas/. Here I share photos submitted by different crafters showing their Ledge Village displays.
Please send along quality photos of your display to me at marji@3dcuts.com and I'll include them on the ideas page.
A little history. There was a period where you could order a house kits from Sears and Roebuck catalog. The Fullerton was one of many models available. Here is a link to the archive of other models.
Important Links to more Ledge Village Resources:

- Ledge Village cutting files are available here. http://3dcuts.com/ledge-village
- Links to all the other Ledge Village Tutorials are available here. http://3dcuts.com/ledge-village-tutorials-all
- Display Ideas here. http://3dcuts.com/ledge-village-ideas/