
Using the Line Segment Overcut Setting in Silhouette V3

This setting, new to V3 of the Silhouette Design Space software, is a perfect setting for this type of design. The star is filled with details and sharp corners.
Silhouette describes this setting as follows:
This option is beneficial for providing cleaner cutting results in the following conditions: Cutting thicker/denser material types (such as chipboard) Cutting smaller block fonts or sharp edged images on various material types (including vinyl) The option will have no effect on rounded edges. It is only effective for images containing sharp edges in order to acheive the best cutting results possible under the conditions listed above. Selecting the "Off" option will have all lines cut normally. Selecting the "On" option will have all straight corners cut with a slight overcut.
What is does is lifts the blade, turns it and then puts the blade back down at each sharp corner. It is a cleaner cut but there is more tapping noises and it takes longer.
Below are the steps (with pictures) for finding and adjusting this setting.
1. Complete your design.
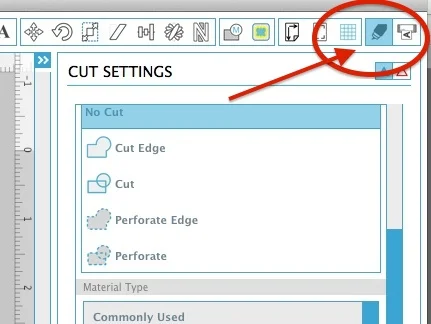
2. Open the Cut Settings box located in the upper right of the window.
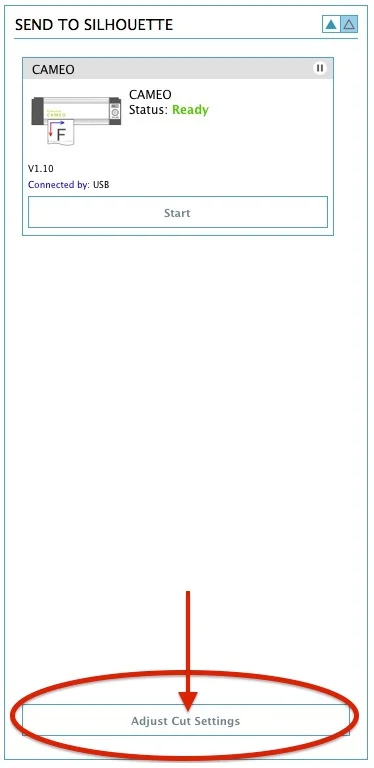
3. Click on Adjust settings at the bottom of the frame.
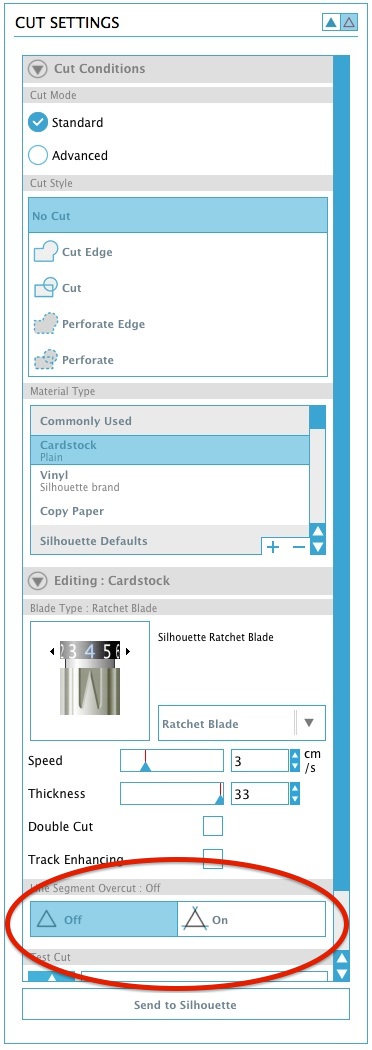
4. Select your material type (cardstock) and scroll down near the bottom of the Cut Settings box and locate the Line Segment Overcut setting. Default setting is OFF.
5. Click on the ON setting. This will enable the corner over cut.
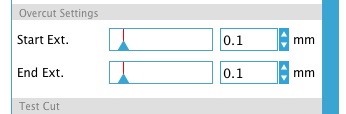
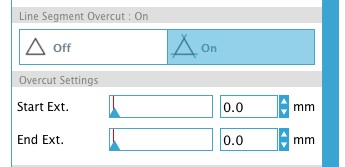
6. Adjust the settings. I click up once on the adjustment arrow on each of the Start Ext. and End Ext options.
Additional hints for detailed cutting:
1. Use a new blade in good condition. Make sure nothing is sticking to the blade or stuck in the blade housing.
2. Use a good mat that still is relatively sticky (not new, that is too sticky). You want your card stock to stay in place.
3. Apply your card stock to the mat and do a thorough job of pressing it down. I turn the mat over and rub it well on the back side with a regular teflon kitchen spatula.
4. After cutting, remove the large negative space pieces by turning the mat over and peeling the mat away from the paper.
5.Use a fine spatula tool for carefully removing the design from the mat.