
Star Light Pillars - Tutorial

Project Description
Scroll down for link to video tutorial.
This tutorial is for the Star Light Pillar designed by 3Dcuts.com. Create a collection of these pillars in various sizes for simple yet stunning centerpieces or mantle displays. The design is appropriate for many different holidays and celebrations from 4th of July through Christmas or even 50th birthday parties. Some ideas are included here but use your imagination for other ways to use this pillar. And send photos of new ideas to me to share here.
You can add a standard LED tea light to provide illumination from within the star. This is optional but does add a WOW factor.
The assembly is easy and basic 3d construction.

Supplies Needed:
Cutting File available at here from 3dcuts.com (http://3dcuts.com/3d-decor-items-assorted/3d-star-light-pillars-7-sizes)
8.5 x 11" card stock - I used the 65lb Cardstock from Recollections available at Michael's.
8.5 x 11" Bright white copier paper -
Adhesive - 1/4" and 1/8" Scor-Tape
Aileen's Tacky Spray Glue
Major Parts Sizes:
7.5" Pillar - 7.5" w x 10.6389" h
7" Pillar - 7" w x 10.6389" h
6.5" Pillar - 6.5" w x 10.6389" h
6" Pillar - 6" w x 10.6389" h
5.5" Pillar - 5.5" w x 10.6389" h
5" Pillar - 5" w x 10.6389" h
4.5" Pillar - 4.5" w x 10.6389" h
Star base (All) - 3.2239" w x 3.2499"h
Links to supplies on Amazon:
Order from Amazon: 12 LED flickering Tea Lights(Affiliate Link)
Order from Amazon: Topstone LED TeaLights with Remote 12 pk (Affiliate Link) ( more expensive but the remote is worth it!)
Order from Amazon:Aleene's Tacky Spray 11 oz (Affiliate Link)
Order from Amazon: Tim Holtz Micro Serrated Snips (Affiliate Link)
Order from Amazon: Premium Silhouette Blade (Affiliate Link)

Steps for completing the Star Light Pillars:
Special Note: I update the instructions online. Check at http://3dcuts.com/star-light-pillar-tutorial for adjustments and additional information. Don't just rely on the pdf file that comes with the download. Learned hints and corrections are added to the the online tutorial. I'll also add photos submitted by other crafters for additional ideas.
1. Download the cutting files for your cutting machine at here from the 3dcuts.com store.
2. Load the files into your cutting software following the steps for your cutting machine.
3. Prepare the files:.
For the Silhouette: The SVG files from this site will need to be turned into cutting files. Click here for detailed steps on how to use SVG files on your Silhouette. http://www.3dcuts.com/tutorial-upload-svg-silhouette
DXF files can be opened in the basic edition of Silhouette Design Studio but often require modifications. I recommend using the Designer Edition and using svg files.
For Cricut Explore: Here is a guide for importing into Cricut Design Space. http://www.3dcuts.com/tutorial-adding-3dcuts-files-to-cricut
For Brother ScanNCut: The svg files will need to be transferred to files for your particular machine. You can change SVG files to FCM files at http://www.canvasworkspace.com/ or Google "How to import SVG files into a ScanNCut" for links to tutorials.
4. Cut the files.
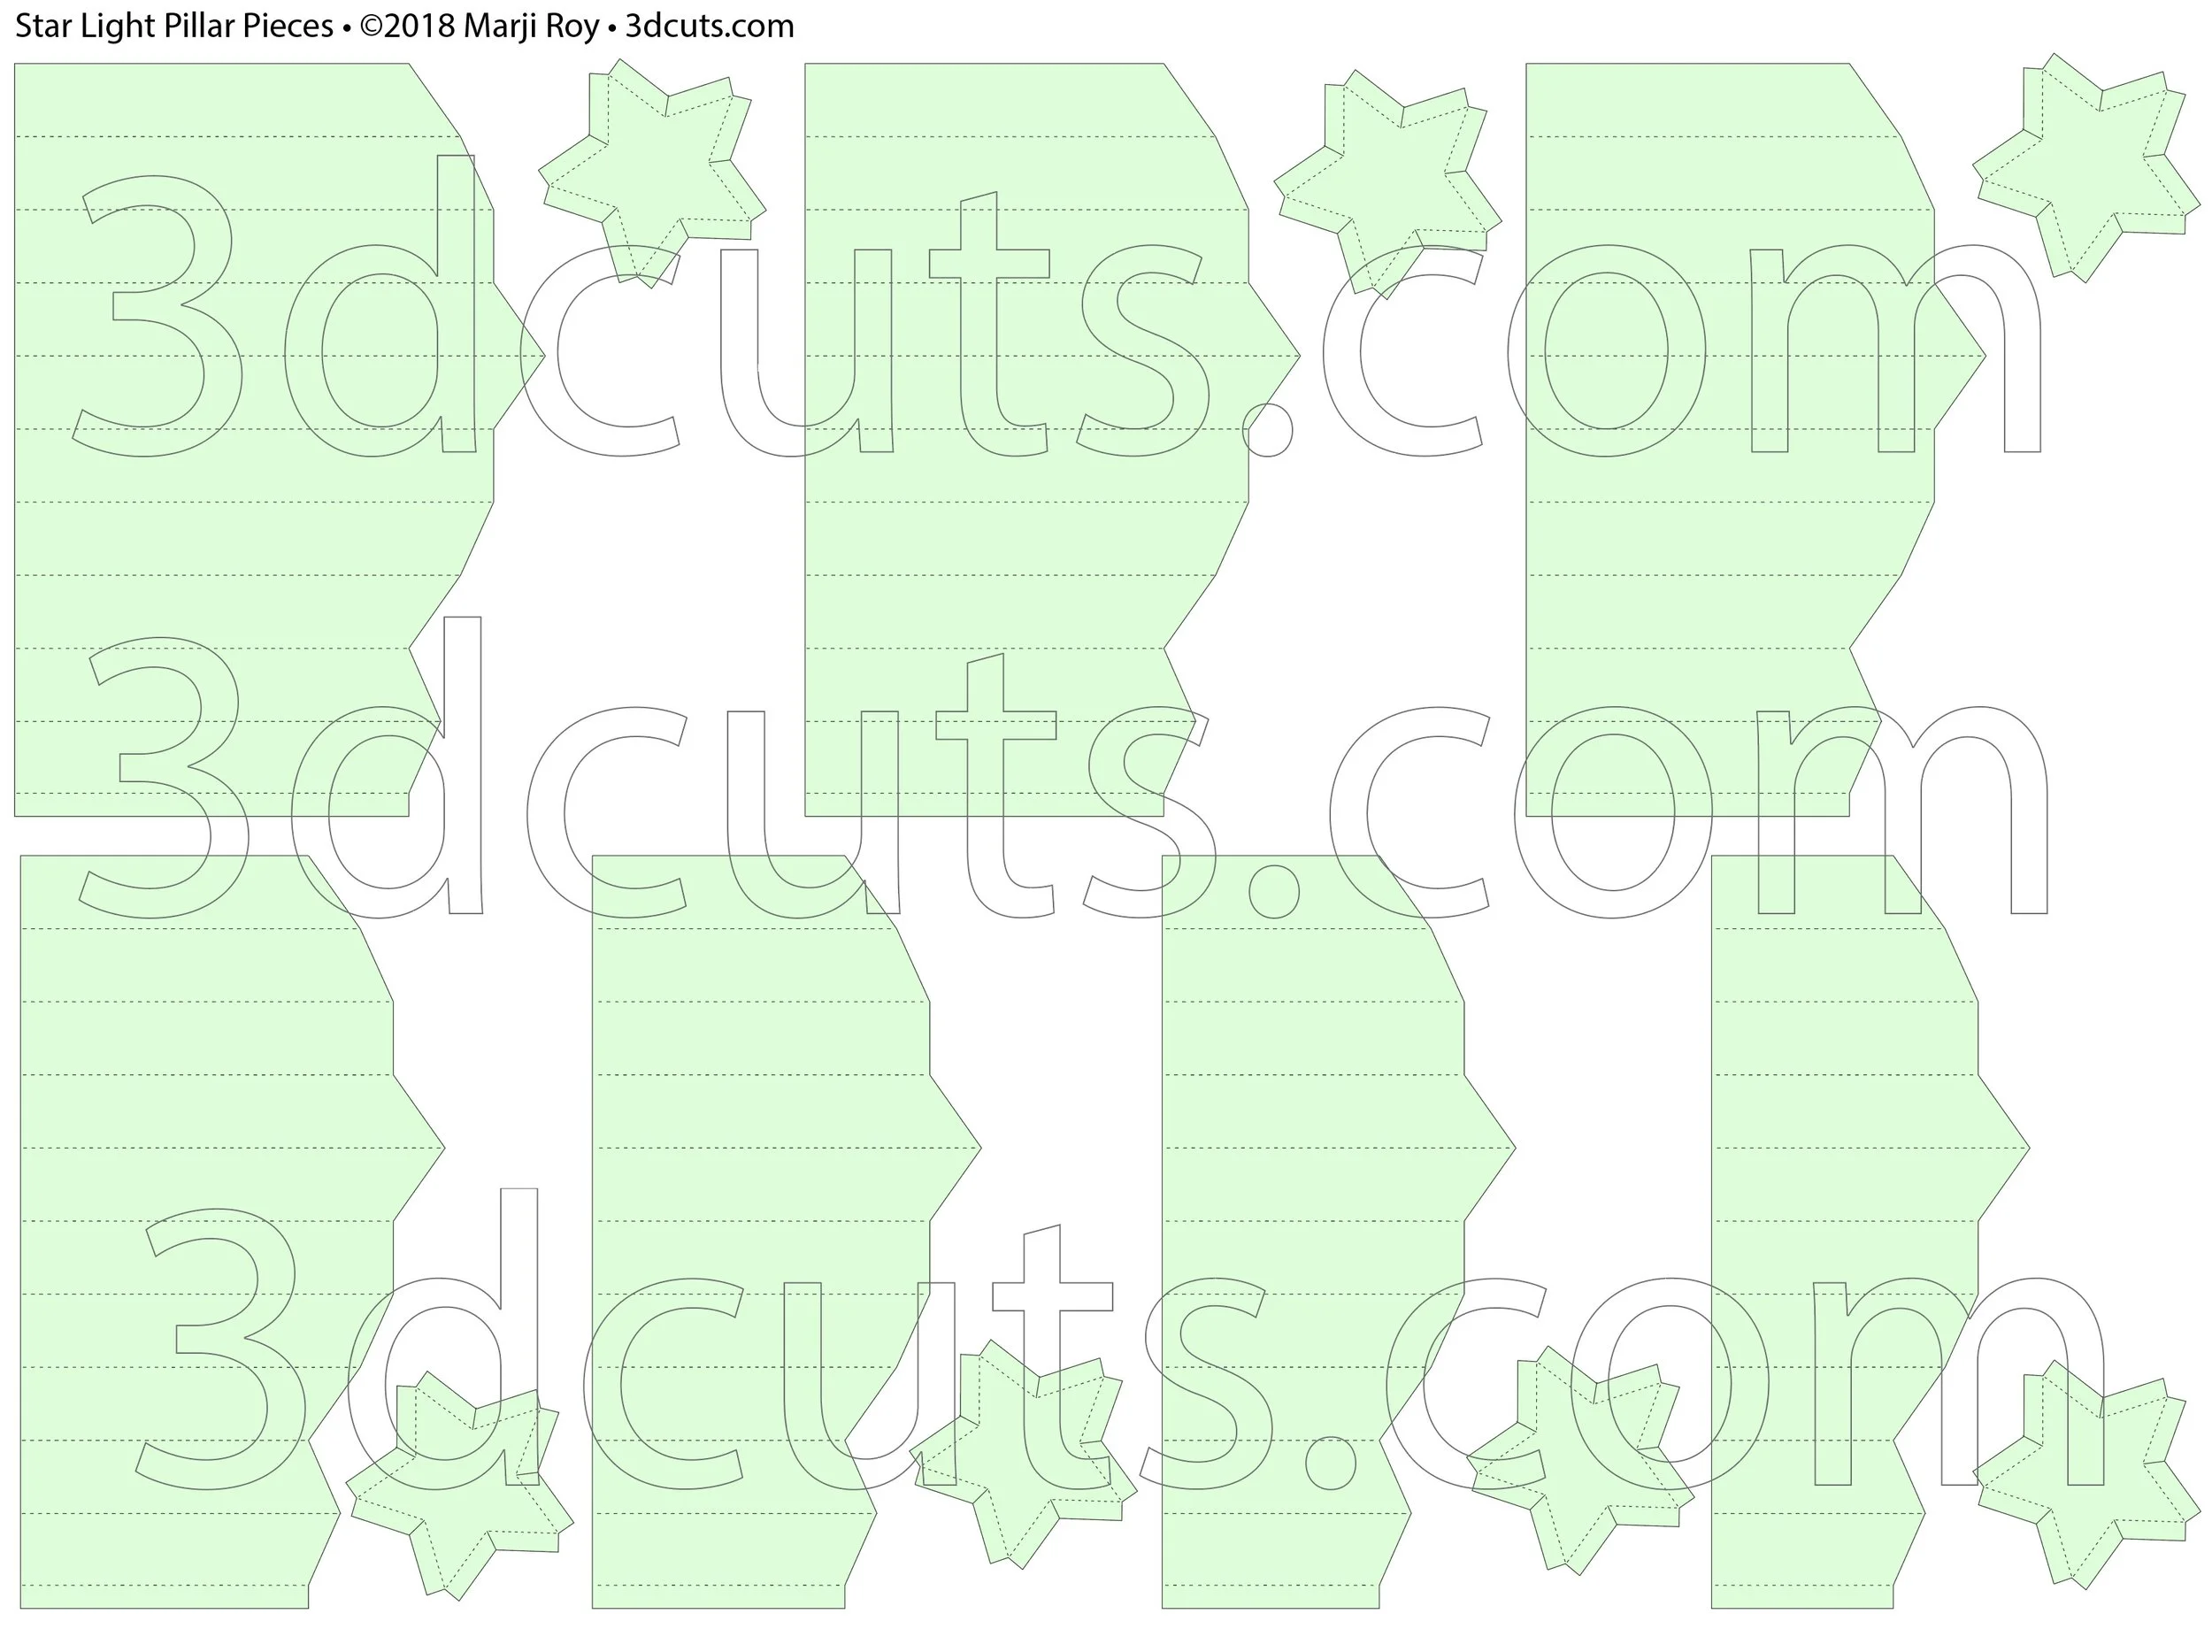
All pieces are cut from card stock.
Here are the various pieces you will be cutting out.
You need 1 side wall plus 1 star base for each pillar. Choose the various sizes that work for your own display.
Each is designed to fit on 8.5 x 11" card stock. The larger ones will take 2 pieces. Or, you can group a star and side wall together and stretch proportionally to expand for 12 x 12" card stock.
I use the cut dotted line for score lines. Fold along these.
Hints on cutting details:
Use a good blade. I have found the Silhouette Premium blade to be well worth the money for those of you using Silhouette.
A mat in good condition is also important. I use the Nicapa mats from Amazon - Nicapa Cutting Mat (Affiliate Link).
Liner paper:
I didn't like the options I had for double-sided card stock (card stock with a different color on each side.) You can use that and skip the steps for adding the white liner. I used thin 24 lb bright white copy paper for the liner NOT card stock so that it would fold without adding bulk. You certainly can experiment with other types of reflective paper. The goal is to create an interior that reflects more light out.
5. Assembly
The assembly steps are detailed in the video below. Here is the url. https://youtu.be/R7zoKyKAmRY
6. Lights:
Adding lights to the Star Pillar is optional. I have provided a couple of links to the various lights I used for the displays shown here. The first link is for the warm white flickering candles in the Christmas display. These provide a golden glow, more like a real candle. The second link is for a different type of LED tea light that doesn't flicker and comes in a variety of colors include blues, pinks and warm whites. The lights you choose do affect the overall impact and it is fun to experiment with a variety. I also note that they have tea lights with remote controls on Amazon now although I have never tried any of them.
Order from Amazon: 12 LED flickering Tea Lights(Affiliate Link)
Order from Amazon: 24 Pk submersible Tea Lights (Affiliate Link)
7.Share:
Take photos of your finished project and share them to Pinterest, Facebook groups, and email them to me at marji@3dcuts.com. I like to share the creative things people do with my files here on the website.
© 2018 Marji Roy • 3dcuts.com
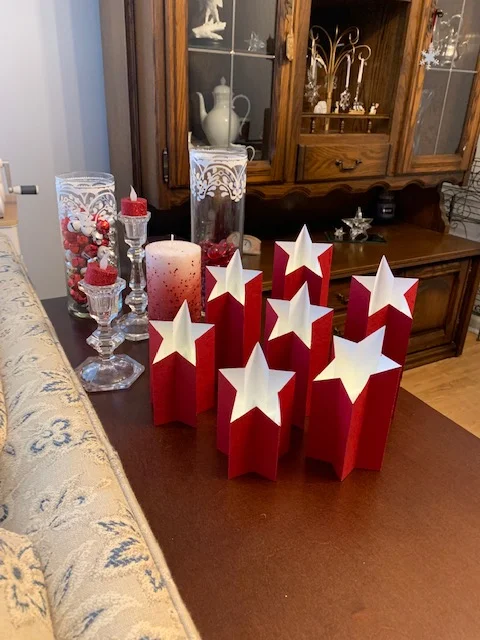
Beautiful Star Light Pillars display created by Judi Kloock Russo of Illinois - 1/2019 - Photo by Judi Kloock Russo.

Star Light Pillars designed by Marji Roy of 3dcuts.com. Cutting files in svg, pdf, png, and dxf formats with tutorials.