How to load .SVG files into Silhouette Designer Edition Software
Using .SVG files in Silhouette requires an extra step. This tutorial will walk you through the process using Silhouette Designer Edition Software. The free version of the Silhouette software will not open the .SVG format. I strongly recommend you purchase the Designer Edition. Improvements to several of the tools made it a great upgrade for me. Additionally, you get to use the huge supply of .SVG files on the web. You just need to follow these steps to easily open them in Silhouette.
Note: Silhouette has recently released version 3 of the software. Since almost everyone still has version 2.9, I'll put these directions up first in version 2.9.4. I will then later upgrade and post them again in the new version. I haven't upgraded yet but will soon and will see the differences (if any).
1. Download a .SVG cutting files from my site here.
2. They will be downloaded to the location you have your computer set to store downloads. I have my computer set to download files to the desktop.
Many computers have a Downloads folder. You need to know how you have your computer set. Go to that location and find the zip file. It has the .zip ending.
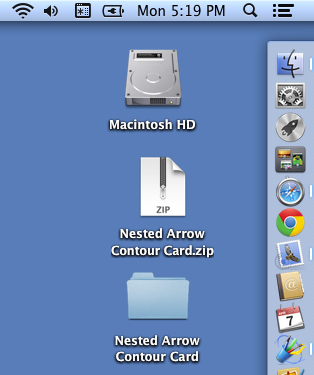
Double-click on the zip file to unzip and create a folder. In the example on the right I downloaded the Nested Arrow Contour Card which is the free file I offer for you to test your software and cutting machine. You can see both the zip file and the folder. The zip file can be trashed once you have unzipped it. Keep the folder with the files.
If using a tablet you will need an app for unzipping files.
3. Launch the Silhouette Designer Edition software and open a new blank document.
Do not install the .SVG file into the library.
Instead, go up to the FILE MENU and down to OPEN.
4. Navigate to the location of the folder you unzipped. For me it is on my desktop and easy to find.
Navigate into the folder and select the .svg file. There will be other files in there for other formats as well. (On a PC you will have to instruct it to look for .svg files.)
Select it and click OPEN or double click on the file name.
5. The .svg files open in the Silhouette Designer Edition software however it will not cut yet. You will need to change all lines to CUT lines.
Select all items by double clicking on them or going up to the EDIT MENU and down to SELECT ALL.
You will know everything is selected if there is a box around it with a green dot at the top.
6. Change all lines to CUT lines.
In v 4 the CUT line selection is accessible when you send the project to cut.
Click on the SEND button in upper right.
Select all and then select the cut option for the tool (blade) you are using. If there were any items you didn’t want to cut then unselect them before changing to cut.
The lines become red when they are cut lines. Only the lines on the mat will change. You need to move pieces around if it is a large multi-piece file.
Proceed with cutting.
Earlier Versions:
In earlier versions there was no SEND menu item. The cut style box was under the scissors menu button.
The lines all become a double red line to indicate they are now CUT lines.
But notice those letters that are just labels? You don't want to have your cutting machine waste time cutting those. You can remove them or change them back to no cut lines.
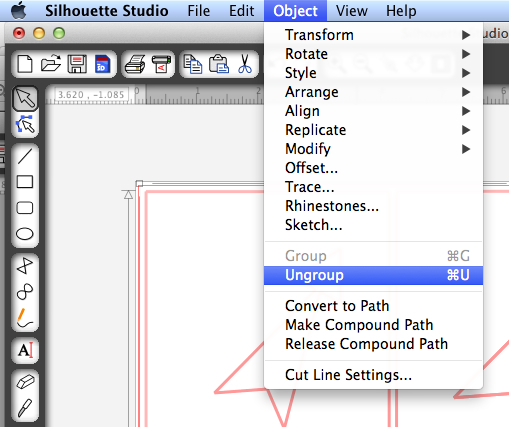
7. Ungroup the design to remove labels.
Make sure everything is still selected and then go up to the EDIT MENU and down to UNGROUP.
8. Select just the labels and either press the delete key or click on the NO CUT icon in the CUT STYLES window. They will no longer have the double red line indicating they are cut lines.
Hint: It can be easier for future identification and following the tutorial to leave the labels.
Once imported and switched to cut lines, you can proceed with the tutorial for each particular cutting file.


