
Christmas Ornament- Folk Art Bird • Tutorial
Project Description:
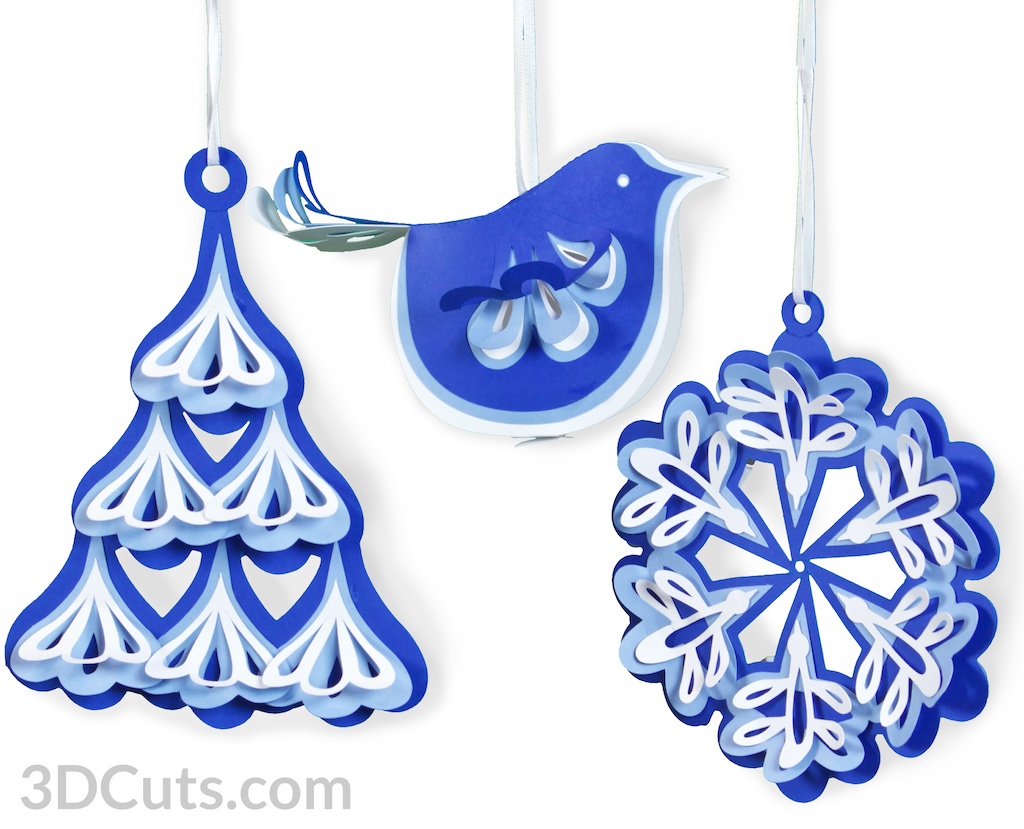
Create a collection of ornaments for your Christmas tree using this series of cutting files and card stock in coordinated colors. The series was loosely inspired by Polish Folk Art design and.includes a snowflake, a bird and holiday tree. All use curled designed to give 3-D effects. This is the tutorial of the the Folk Art Bird. When finished it is about 4.5" high and can be unhooked at is belly to store flat in the off- season.
There are 3 tutorials in this set. Here are links to them all:

Christmas Ornament- Folk Art Bird - Tutorial

Supplies Needed:
- Cutting File here.
- 8.5 x 11" card stock - I used the 110lb Neenah Cardstock from Amazon for the white and Michael's Recollections for the colors.
- A good paper adhesive that prevents curling. I use Scotch Quick Drying Tacky Glue
- 10" of coordinating 1/8" (3mm) sating ribbon
Parts sizes: - in inches Sizes are when in orientation shown to right.
- Outer Layer (White) 5.6997" w x 5.6403' h
- Middle Layer (Lt Blue) 3.9588"w x 3.4604" h
- Inner Layer (dk Blue)4.3743" w x 4.2799" h
- Middle Tail (lt blue) 3.1398" w x 1.5166" h
- Inner Tail (dk blue) 1.9092" w x 3.3609" h
- Reinforcer .05916" w x .6087"h
Order supplies from Amazon:
Steps for completing the Folk Art Bird Christmas Ornament:

Special Note: I update the instructions online. Check here for adjustments and additional information. Don't just rely on the pdf file that comes with the download. This file is located at http://3dcuts.com/ornament-folk-art-bird-tutorial.
1. Download the cutting files for your cutting machine from the 3dcuts.com store here.
2. Load the files into your cutting software following the steps for your cutting machine.
3. Prepare the files:.
- For the Silhouette: The SVG files from this site will need to be turned into cutting files. Click here for detailed steps on how to use SVG files on your Silhouette. http://www.3dcuts.com/tutorial-upload-svg-silhouette
- For Cricut Explore: Here is a guide for importing into Cricut Design Space. http://www.3dcuts.com/tutorial-adding-3dcuts-files-to-cricut
4. Cut the files.
- Pieces are cut fro 3 colors of card stock.I used blues for the tutorial but you can use any favorite combination.
5. Remove the cutting mat carefully. I find the paper curls less if I peel the mat away from the paper and not the other way around.

6. Fold the outer double piece on the dotted lines as shown. It is a curved fold so you need to coax into place.
- Fold along the dotted fold lines.
- There is one on each side.
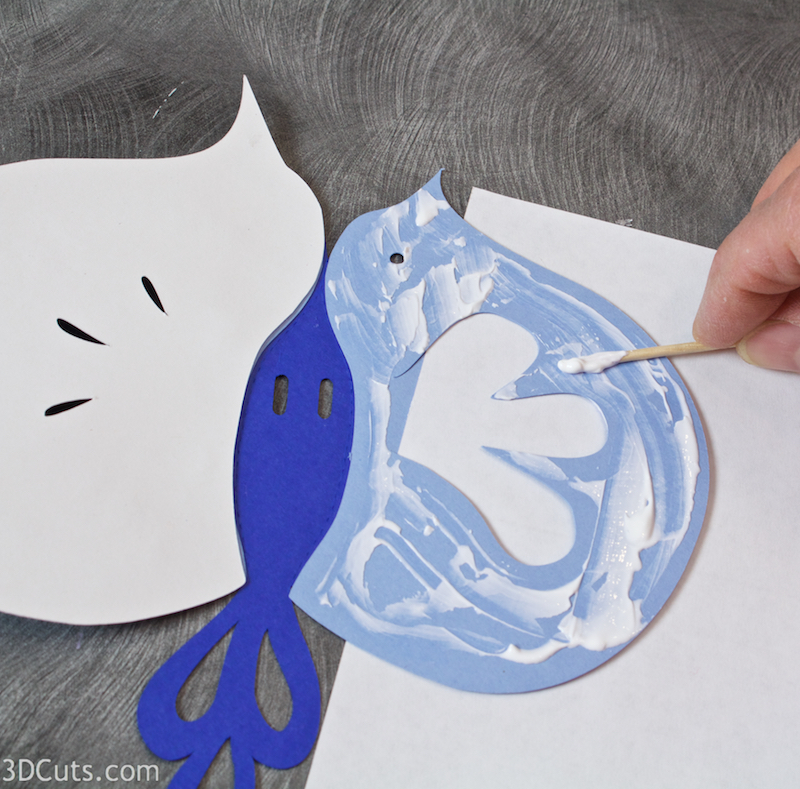
- One middle layer bird gets adhered into the inside of each half of the outer bird. There are a couple of indicators for correct alignment.
- First it is important that the inside layered be position slightly below the dotted fold line- about 1/16th". If you are too close it will interfere with the folding.
- Second the eye hole should center inside the first eye hole.
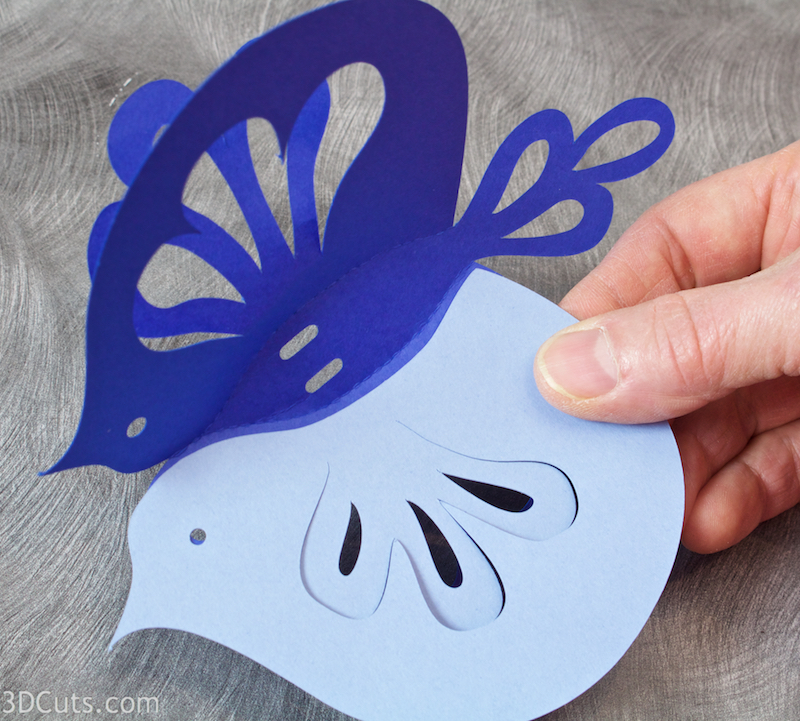

- Adhere the middle bird to the inside of the outer bird body. Put NO glue on the wing. You do not want those to stick together.
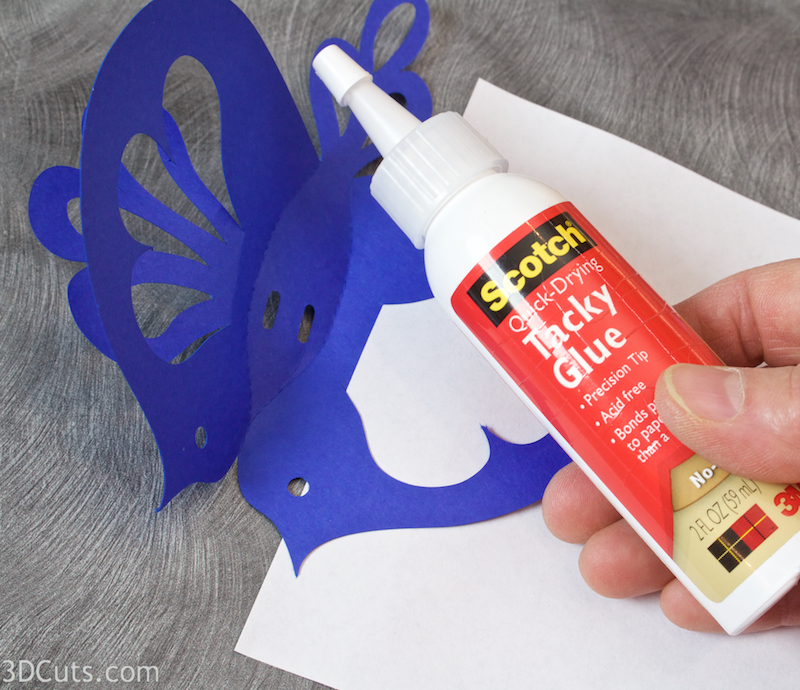
- I slide a piece of scrap paper under the bird and over the wing to prevent me from getting any glue on the wing.
- I used Scotch Quick-Drying Tacky Glue because it dries quickly and is strong.
- I used a tooth pick to spread a light layer over 1/2 the bird body - none on the back.
- I applied glue on the smaller side - here the dark blue- and not the larger side.


- Place the middle layer and adhere.
- The inner bird (shown as white here) gets adhered to the inside next. It is positioned as shown. Watch the beak area for good placement.

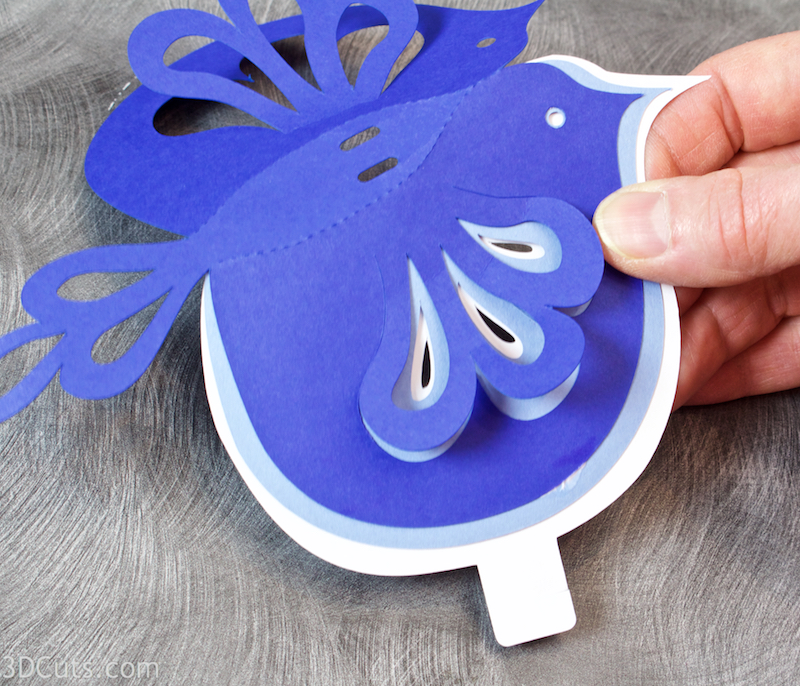
- Spread a thin layer of adhesive on the middle bird and then adhere the white inner bird to it being careful with placement.


- Repeat these steps on the second half of the bird.
- Glue the middle level in place. Remember to use scrap paper to hide the wing.
- Glue the inner layer in place.

- Glue the Reinforcer in place. This goes around the ribbon holes to make them stronger. Cover one side of the little piece with glue and glue it over the holes in the back keeping the holes open.


- Notice the tail is not symmetrical. Position it to match. Glue the middle level tail in place. Just add adhesive to the stem - no glue on the feather part.
- Repeat with the inner layer of the tail.
- Allow parts to dry before trying to curl.


- Add the ribbon while the bird is still flat. Insert the 2 ends of the 1/8" satin ribbon into the back holes from the inside. Knot them to form a hanging loop on the top.
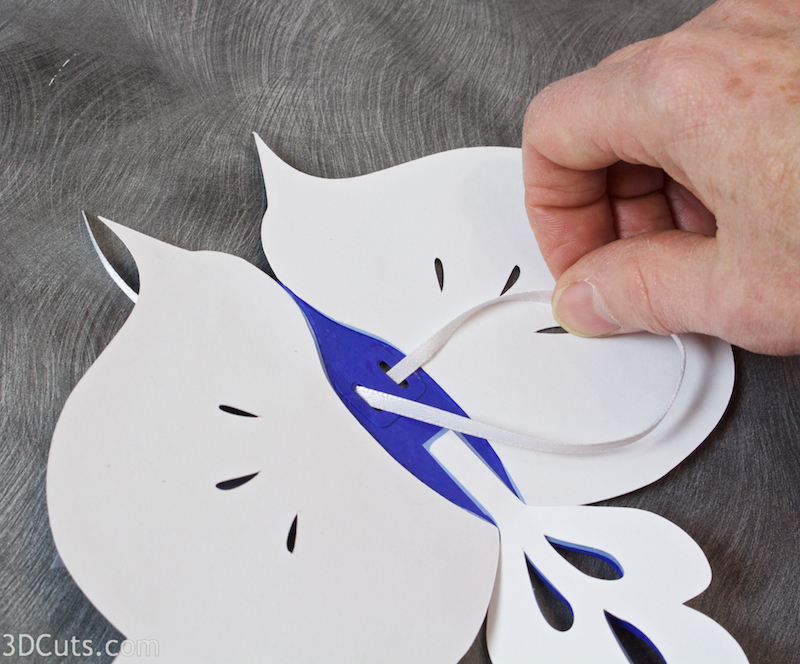

- Hook the belly tabs together. These do not get glued. Leave them so you can unhook them and store the bird flat during the off-season.

- Using a round implement - I used a 3/8" wooden dowel, Curl each layer of wings to give them dimension.


- The Folk Art Bird Christmas Ornament is complete. How about trying the other coordinating ornaments including the tree and the snow flake, all by 3dcuts.com.


Card Design © 2014 • 3DCuts.com • Marji Roy
Tutorial © 2017 • 3DCuts.com • Marji Roy